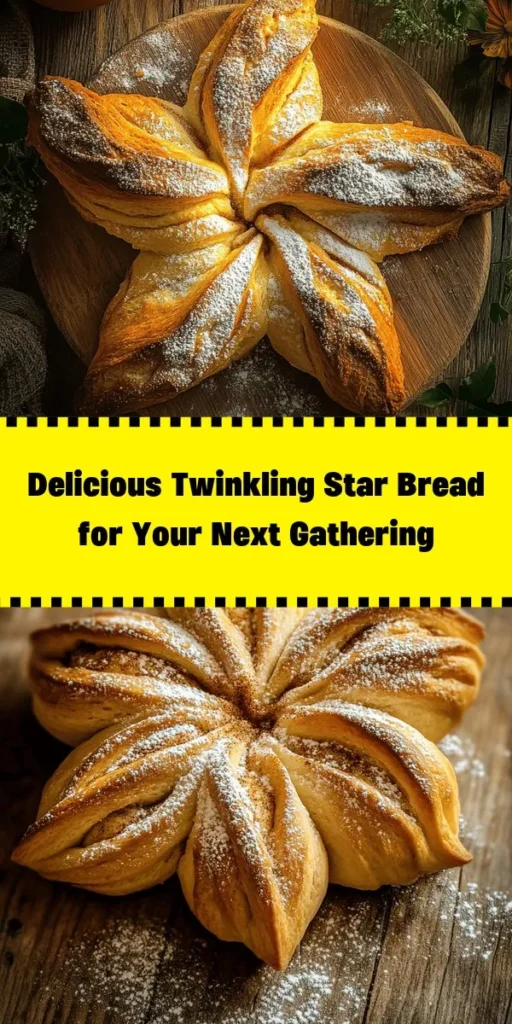
Introduction
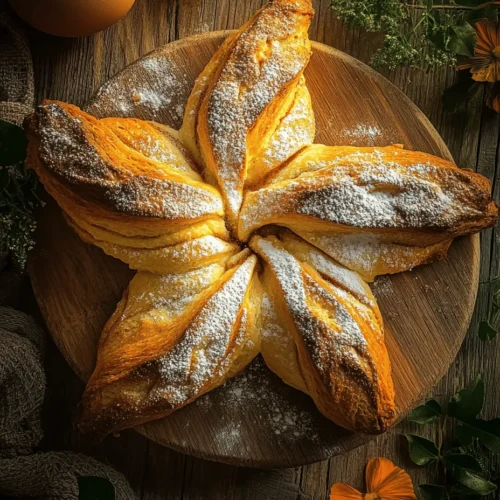
Twinkling Star Bread is not just a recipe; it’s an enchanting experience that captivates both the eyes and the palate. With its star-shaped design and soft, pillowy texture, this festive bread is perfect for celebrations, holidays, or simply to brighten up an ordinary day. The allure of this bread lies not only in its stunning presentation but also in the delightful aroma that wafts through your kitchen as it bakes. Crafting homemade bread has a unique charm, creating memorable moments that linger long after the last crumb is gone. This Twinkling Star Bread will undoubtedly become a treasured addition to your baking repertoire, offering a delicious way to gather friends and family around the table.
In this article, we invite you to dive into the easy steps required to create this delightful treat. Whether you’re a seasoned baker or a novice in the kitchen, the process of making Twinkling Star Bread is both accessible and rewarding. Let’s explore the ingredients that come together to create this magical bread and the simple steps to bring it to life.
Understanding the Ingredients
Before we embark on the journey of crafting Twinkling Star Bread, it’s essential to understand the role of each ingredient in the recipe. Each component contributes uniquely to the dough’s texture, flavor, and overall success. Here’s a closer look at the key ingredients:
All-Purpose Flour
The foundation of any bread recipe is flour, and for Twinkling Star Bread, all-purpose flour is the primary choice. This versatile flour provides the necessary structure and texture, allowing the dough to rise beautifully. With a moderate protein content, all-purpose flour strikes the perfect balance between tenderness and chewiness, ensuring that each bite of your star bread is light and airy.
Granulated Sugar
Granulated sugar does more than just sweeten the dough; it plays a crucial role in browning the crust as the bread bakes. Sugar enhances the flavor profile, providing a subtle sweetness that complements the cinnamon filling. Additionally, it helps to tenderize the dough by inhibiting gluten formation, resulting in a softer texture.
Active Dry Yeast
Yeast is the magical ingredient that brings bread to life. Active dry yeast is essential for fermentation, converting sugars into carbon dioxide gas, which causes the dough to rise. This process not only gives the bread its airy structure but also contributes to the development of flavors. It’s important to ensure that your yeast is fresh and active for the best results.
Salt
Often overlooked, salt is a critical ingredient in bread-making. It not only enhances the overall flavor but also plays a vital role in strengthening gluten. The right amount of salt helps to control the fermentation process, ensuring that the yeast works effectively without overpowering the dough.
Warm Milk
Warm milk serves multiple purposes in this recipe. It activates the yeast, allowing for effective fermentation while enriching the dough with moisture and fat. The warmth promotes a cozy environment for yeast growth, ensuring a successful rise. For those who prefer a dairy-free option, warm water can be used instead.
Unsalted Butter
Butter adds richness and flavor to the dough, contributing to its tender texture. Unsalted butter is preferred in baking to allow for better control over the salt content in the recipe. The fat in butter also helps to create a moist crumb, enhancing the overall eating experience.
Eggs
Eggs are essential binders in the dough, providing structure and moisture. They also contribute to the bread’s golden color and add richness. Including eggs in the recipe enhances the flavor and creates a more complex texture, making the bread even more delightful.
Vanilla Extract
A splash of vanilla extract infuses the dough with its warm, aromatic flavor, elevating the overall taste of the Twinkling Star Bread. This subtle addition brings an extra layer of sweetness that complements the cinnamon filling, making each bite a delightful experience.
Cinnamon Sugar
The star of this recipe is undoubtedly the cinnamon sugar filling. A blend of granulated sugar and ground cinnamon, this mixture brings warmth and spice to the bread. The sweet and fragrant filling not only adds flavor but also creates a beautiful contrast against the soft, buttery dough.
Egg Wash
To achieve a stunning golden finish on the bread, an egg wash is applied before baking. This simple mixture of beaten egg and a splash of water gives the crust a glossy sheen, making the Twinkling Star Bread visually appealing.
Optional Powdered Sugar
For a final touch, a dusting of powdered sugar can be added after baking. This not only enhances the presentation but also adds a sweet finish that makes the bread irresistibly tempting.
Step-by-Step Instructions to Craft Twinkling Star Bread
Now that we’ve explored the ingredients, let’s move on to the step-by-step instructions for creating your own Twinkling Star Bread. The process is straightforward and designed to guide you through each phase, ensuring your success in the kitchen.
Preparing the Dough
1. Combine Dry Ingredients: In a large mixing bowl, whisk together the all-purpose flour, granulated sugar, and salt. This step is crucial as it ensures that the salt and sugar are evenly distributed throughout the flour, which is essential for flavor and yeast activation.
2. Activate the Yeast: In a separate bowl, combine warm milk and active dry yeast. Allow the mixture to sit for about 5-10 minutes until it becomes frothy. This indicates that the yeast is active and ready to work, which is vital for the dough to rise properly.
3. Mix Wet Ingredients: In another bowl, melt the unsalted butter and let it cool slightly. Then, add the eggs and vanilla extract to the butter, whisking until well combined.
4. Incorporate Ingredients: Gradually pour the yeast mixture into the flour mixture, followed by the butter and egg mixture. Using a wooden spoon or a spatula, stir until the dry ingredients are just incorporated. This gradual mixing is essential to avoid creating a sticky mess and ensures a smoother dough consistency.
Kneading the Dough
5. Knead the Dough: Transfer the dough onto a lightly floured surface. Begin kneading the dough by folding it over itself and pushing it down with the heel of your hand. Rotate the dough a quarter turn after each push. Knead for about 8-10 minutes until the dough is smooth and elastic. This process develops the gluten, which gives the bread its structure and chewiness.
First Rise
6. First Rise: Once the dough is kneaded, shape it into a ball and place it in a lightly greased bowl. Cover the bowl with a clean kitchen towel or plastic wrap, and set it in a warm, draft-free area to rise. Allow the dough to double in size, which typically takes about 1-2 hours, depending on the ambient temperature. A successful rise is crucial as it enhances the flavor and texture of the bread.
Preparing the Filling
7. Prepare the Cinnamon Sugar Filling: While the dough is rising, mix together granulated sugar and ground cinnamon in a small bowl. This fragrant blend will serve as the filling for your Twinkling Star Bread, adding both sweetness and warmth.
8. Plan for Variations: If desired, consider adding chopped nuts, raisins, or chocolate chips to the cinnamon sugar mixture for a unique twist on the classic filling. These additions can elevate the flavor profile, making your Twinkling Star Bread even more special.
With these steps, you’re well on your way to creating a stunning Twinkling Star Bread that will impress family and friends alike. Stay tuned for the next part, where we’ll guide you through shaping the dough into a twinkling star and baking it to perfection.
Shaping the Star Bread
Once your dough has risen beautifully, it’s time for the fun part: shaping your Twinkling Star Bread. This process involves rolling and stacking dough circles to create the stunning star design that makes this bread a showstopper.
Rolling and Stacking the Dough Circles
Begin by dividing your dough into equal portions. Depending on your recipe yield, you may have anywhere from four to six equal pieces. Lightly dust your work surface with flour to prevent sticking. Take your first piece of dough and roll it out into a thin circle, approximately 12 inches in diameter. Use a rolling pin to achieve an even thickness, ensuring the edges are not thicker than the center.
Once you have your dough circle, transfer it to a baking sheet lined with parchment paper. Repeat this process for the remaining pieces of dough, layering each circle on top of the previous one. Between each layer, you can add your choice of filling—this could be a mixture of cinnamon and sugar, pesto, or even a sweet chocolate spread. The key is to maintain an even layer, spreading the filling with a spatula or your fingers, so it reaches the edges of the circle.
Visual Description of the Layering Process
As you stack each rolled circle, the vibrant colors of the filling will gradually emerge, creating a beautiful contrast against the dough. Once all layers are stacked, you should have a beautiful tower of dough, filled with delightful flavors. The visual appeal of the layered dough not only enhances the presentation but also ensures that each bite will be bursting with flavor.
Cutting and Twisting
Now that your dough is beautifully stacked and filled, it’s time to cut and twist it into the iconic star shape.
Step-by-Step Guidance on Creating the Star Shape
1. Center Marking: Begin by marking the center of your layered dough stack with a small knife or a skewer. This will be your pivot point for the twisting.
2. Dividing the Dough: Using a sharp knife or pizza cutter, make four equal cuts from the outer edge of the circle to the center mark. This will create eight triangular wedges.
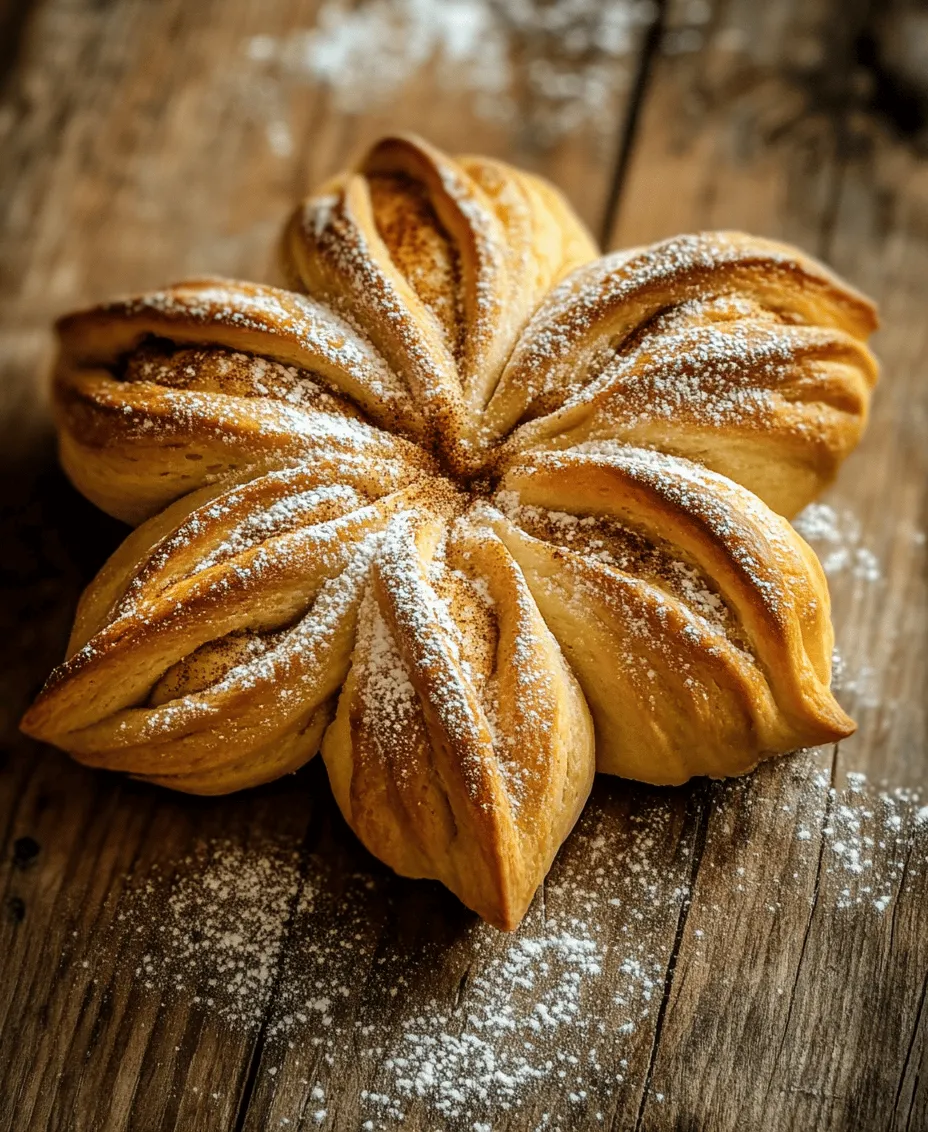
3. Twisting the Wedges: Carefully pick up two adjacent wedges and twist them away from each other, about 180 degrees. Repeat this process for all pairs of adjacent wedges around the circle. This twisting action will create the star shape and give the bread its unique, eye-catching appearance.
Importance of Precision in Slicing for Even Twisting
The precision of your cuts is essential for achieving an even twist. If your cuts are uneven, some points of the star may twist more than others, leading to an unbalanced appearance. Take your time with this step, ensuring each cut is clean and intentional for a beautifully shaped star bread.
Second Rise
After forming your star, it’s crucial to allow it to rise again before baking.
Explanation of the Purpose of the Second Rise
The second rise is essential as it allows the gluten in the dough to relax and the yeast to work its magic one more time, creating an airy texture and enhancing the overall flavor of the bread. This step also helps the dough to hold its shape during baking.
Tips for Handling the Dough Delicately to Maintain Shape
When transferring your twisted dough to a baking sheet or allowing it to rise, handle it gently. Avoid pressing down or squishing the dough, as this can deflate the air pockets formed during the first rise. Cover the bread loosely with a clean kitchen towel or plastic wrap to prevent it from drying out while it rises for about 30 to 45 minutes.
Preheating the Oven
While your star bread rises, it’s time to prepare your oven.
Importance of Oven Temperature for Baking Success
Preheating your oven to the correct baking temperature—usually around 375°F (190°C)—is crucial for a successful bake. A properly heated oven ensures that the bread expands quickly at the beginning of the baking process, resulting in a light and fluffy texture.
Quick Tips for Checking Oven Readiness
To check if your oven is ready, you can use an oven thermometer for accuracy, or simply wait about 15-20 minutes after setting the temperature. An easy way to gauge if your oven is ready is to place your hand near the open oven door; you should feel a strong rush of hot air.
Egg Wash Application
Before placing your Twinkling Star Bread in the oven, applying an egg wash can enhance its appearance.
Techniques for Applying the Egg Wash for a Shiny Finish
To create the egg wash, whisk one egg with a tablespoon of water or milk. Using a pastry brush, gently apply the wash over the surface of the dough. This will give your bread a beautiful golden color and a shiny finish after baking. Take care to avoid excess pooling in the crevices, as this can lead to an uneven surface.
Suggestions for Alternative Washes for Dietary Preferences
If you prefer a vegan option, you can use a mixture of non-dairy milk and maple syrup, or even a simple water and cornstarch mix, which will still provide a nice sheen without the use of eggs.
Baking the Star Bread
Now that your Twinkling Star Bread is shaped, risen, and brushed with egg wash, it’s time for the final step.
Indicators of Doneness to Ensure Perfect Baking
Bake your star bread in the preheated oven for about 25-30 minutes, or until it turns a deep golden brown. You can check for doneness by tapping the bottom of the bread; it should sound hollow. Additionally, the aroma of freshly baked bread will fill your kitchen, signaling that it is almost ready.
Overview of How Aroma and Color Signal Readiness
As the bread bakes, keep an eye on the color. The golden hue indicates that it is cooking properly—dark spots may signal uneven baking or overly high temperatures. If the top is browning too quickly, you can cover it loosely with aluminum foil to prevent burning while the inside continues to cook.
Serving the Bread
Once your Twinkling Star Bread is baked to perfection, it’s time to serve and enjoy.
Presentation Tips for an Inviting Display
Transfer the bread to a serving platter while it’s still warm. The star shape is naturally appealing, so consider garnishing it with a light dusting of powdered sugar or a drizzle of icing for added sweetness. You can also serve it alongside a selection of dips or spreads, elevating its presentation.
Ideas for Serving Alongside Beverages or as Part of a Brunch Spread
Twinkling Star Bread pairs wonderfully with a variety of beverages. Consider serving it with freshly brewed coffee, a selection of herbal teas, or even a glass of sparkling juice. For a brunch spread, it complements fruit salads, yogurt, or savory dishes like quiche or frittatas, making it a versatile addition to any meal.
Nutritional Information
Understanding the nutritional value of your homemade Twinkling Star Bread can help you enjoy it mindfully.
Breakdown of Calories and Macronutrient Content Per Serving
Typically, one serving of Twinkling Star Bread (approximately one-eighth of the loaf) contains around 150-200 calories, depending on the fillings used. The macronutrient content will vary, but you can generally expect about 5 grams of protein, 25 grams of carbohydrates, and 5 grams of fat.
Discussion on the Balance of Ingredients in Terms of Health
Using whole ingredients like flour, eggs, and natural sweeteners provides a wholesome base. You can adjust the recipe to include healthier alternatives, such as using whole wheat flour or reducing sugar, to align the bread more closely with your dietary preferences.
Pairing Suggestions
To make the most out of your Twinkling Star Bread experience, consider these pairing suggestions.
Ideal Beverages and Dishes to Accompany Twinkling Star Bread
For a delightful pairing, serve your star bread with rich hot chocolate, spiced chai, or even a refreshing iced latte. If you’re hosting a gathering, it makes a perfect centerpiece alongside cheese boards or charcuterie platters.
Creative Serving Ideas for Various Occasions Like Holidays and Gatherings
For holidays, consider adding festive touches like cranberry or orange zest to the fillings. During gatherings, you could create a bread bar, offering various spreads—think cream cheese, herb butters, or fruit preserves—allowing guests to personalize their bread experience.
Conclusion
Making Twinkling Star Bread is not just about baking; it’s about bringing a little magic to your kitchen and creating memorable moments with loved ones. The joy of pulling a beautifully golden, star-shaped loaf from the oven is truly satisfying.
Encourage sharing the experience with family and friends—whether through a brunch gathering or a cozy evening at home. Homemade baked goods like this not only nourish the body but also foster connections, making every bite a celebration of love and togetherness. So roll up your sleeves, gather your ingredients, and let the spirit of baking shine bright in your home.