
Introduction
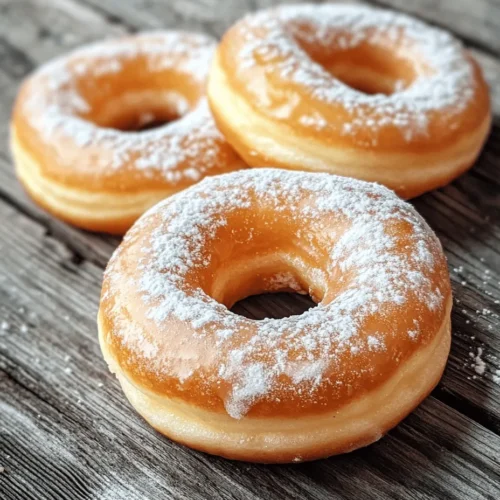
Donuts have earned a special place in the hearts of many, transforming from a simple breakfast item to a beloved indulgence found in cafes and bakeries worldwide. Their fluffy texture, sweet glaze, and endless flavor possibilities make them a delightful treat for people of all ages. Among the myriad of donut varieties, “Melt In Your Mouth Glazed Donuts” stand out as the epitome of comfort food. These donuts are not just any ordinary treat; they are a warm, sweet, and tender bite that promises to bring joy to any occasion—be it a Sunday brunch, a festive gathering, or a simple afternoon snack.
The magic of making donuts at home lies in the ability to customize flavors and fillings while ensuring freshness and quality. Baking these donuts from scratch allows you to control the ingredients, making it an even more rewarding experience. The enticing aroma of freshly fried donuts wafting through your kitchen is sure to delight your family and friends, creating a warm and inviting atmosphere. If you’ve ever dreamed of biting into a soft, fluffy donut that practically melts in your mouth, this recipe is for you.
The Allure of Homemade Donuts
When it comes to donuts, there’s a notable difference between store-bought varieties and those made at home. Store-bought donuts often come with a long list of preservatives and artificial flavors, while homemade donuts allow for an authentic experience that emphasizes quality ingredients and personal touch. Crafting your donuts provides the opportunity to experiment with flavors, textures, and glazes that you simply won’t find in a box from the bakery.
The joy of creating something from scratch cannot be overstated. From mixing the ingredients to watching the dough rise and finally frying them to golden perfection, every step is a labor of love. As you knead the dough, you might reflect on how this simple act connects you to generations of home bakers who have also found happiness in creating delicious treats. A well-known quote by food writer M.F.K. Fisher encapsulates this sentiment perfectly: “The only time to be positive you are in the right place is when you are at the table with your family.” Making donuts at home is about more than just the final product; it’s about the experience, the memories, and the joy of sharing something homemade with loved ones.
Understanding the Ingredients
Creating the perfect glazed donut involves a careful selection of ingredients, each playing a vital role in the overall flavor and texture. Let’s take a closer look at what goes into these melt-in-your-mouth delights:
All-Purpose Flour
All-purpose flour serves as the backbone of your donut dough. It provides the structure and texture needed to achieve that fluffy interior. A high-quality flour will yield better results, ensuring that your donuts have the right balance of chewiness and tenderness.
Granulated Sugar
Sugar is not just for sweetness; it also contributes to the moisture content in your donuts. Granulated sugar helps to create a tender crumb, allowing each bite to melt in your mouth. It also enhances the overall flavor profile, making your donuts irresistible.
Baking Powder
As a leavening agent, baking powder is crucial for achieving that light and airy texture. It helps the donuts rise while frying, creating a fluffy interior that contrasts beautifully with the crisp exterior.
Salt
While salt might seem like an afterthought, it plays an essential role in enhancing flavor. A pinch of salt in your donut dough elevates the sweetness and balances the flavors, ensuring that each bite is well-rounded.
Nutmeg
Although optional, nutmeg adds a warm and aromatic spice to your donuts. This subtle flavor can elevate the overall taste, giving your donuts a hint of warmth and a touch of nostalgia.
Whole Milk
Whole milk contributes richness and moisture to your donut batter. It helps create a soft texture while also enhancing the flavor, making your donuts more indulgent.
Unsalted Butter
Butter is a key ingredient that adds flavor and tenderness to your donuts. Using unsalted butter allows you to control the salt content better, ensuring a perfectly balanced flavor.
Eggs
Eggs act as a binding agent in your donut recipe, providing structure and richness. They also contribute to the overall moisture content, making your donuts soft and decadent.
Vanilla Extract
Vanilla extract is the aromatic flavor enhancer that brings all the other flavors together. A splash of pure vanilla extract adds a lovely depth to your donuts, making them even more enjoyable.
Oil for Frying
The choice of oil for frying is crucial in achieving that perfect golden crust. A neutral oil with a high smoke point, such as vegetable or canola oil, is ideal for frying donuts. This ensures that the donuts cook evenly without imparting any unwanted flavors.
The Importance of Quality Ingredients
Using high-quality ingredients cannot be overstated when it comes to creating delicious donuts. Fresh, top-notch ingredients will not only enhance the flavor but will also affect the texture and overall success of your recipe. Whether it’s organic flour, farm-fresh eggs, or pure vanilla extract, investing in quality will elevate your homemade donuts to the next level.
Step-by-Step Guide to Making Melt In Your Mouth Glazed Donuts
Now that we’ve covered the essential ingredients, let’s dive into the preparation process. Making melt-in-your-mouth glazed donuts at home is easier than you might think! Follow this detailed step-by-step guide to create your own batch of delicious treats.
Step 1: Gather Your Ingredients
Before you start, make sure you have all your ingredients at hand. This includes all-purpose flour, granulated sugar, baking powder, salt, nutmeg (if using), whole milk, unsalted butter, eggs, vanilla extract, and oil for frying. Having everything ready will streamline the process and ensure you don’t miss any crucial steps.
Step 2: Prepare the Dough
In a large mixing bowl, combine your dry ingredients: all-purpose flour, granulated sugar, baking powder, salt, and nutmeg. Whisk them together until well combined. In a separate bowl, mix the wet ingredients: whole milk, melted unsalted butter, eggs, and vanilla extract. Whisk these until smooth.
Step 3: Combine Wet and Dry Ingredients
Gradually add the wet ingredients to the dry mixture, stirring gently with a wooden spoon or spatula until a dough begins to form. Be careful not to overmix; it’s okay if there are a few lumps. The goal is to combine the ingredients without activating the gluten too much, ensuring a tender donut.
Step 4: Knead the Dough
Lightly flour a clean surface and turn out the dough. Knead it gently for about 1-2 minutes until it becomes smooth. This is a crucial step for developing the right texture. Avoid over-kneading, as this can lead to tough donuts.
Step 5: Roll and Cut the Donuts
Using a rolling pin, roll the dough out to about ½ inch thick. Use a donut cutter or two round cookie cutters (one larger and one smaller) to cut out the donuts. Place the cut donuts on a floured baking sheet, making sure they are spaced apart.
Step 6: Heat the Oil
In a deep pot or fryer, heat oil to 350°F (175°C). Use a thermometer to ensure the oil reaches the correct temperature. A consistent temperature is vital to achieving that perfect golden crust without overcooking the inside.
Step 7: Fry the Donuts
Carefully place a few donuts at a time into the hot oil, being cautious not to overcrowd the pot. Fry each donut for about 1-2 minutes on each side, or until they are golden brown. Use a slotted spoon to remove them from the oil and let them drain on a paper towel-lined plate.
Step 8: Prepare the Glaze
While the donuts are cooling, prepare the glaze. In a medium bowl, whisk together powdered sugar, milk, and vanilla extract until smooth and creamy. Adjust the consistency by adding more milk for a thinner glaze or more powdered sugar for a thicker glaze.
Step 9: Glaze the Donuts
Once the donuts have cooled slightly, dip the tops into the glaze, allowing any excess to drip off. Place the glazed donuts on a wire rack to set before enjoying this delightful treat.
With these steps, you are well on your way to creating homemade “Melt In Your Mouth Glazed Donuts” that will impress your family and friends. The combination of fresh ingredients, a thoughtful preparation process, and a touch of love makes all the difference in the world of baking. Stay tuned for the continuation of this recipe, where we will share tips for best results and answer some of the most common questions about making donuts at home.
Mixing Dry Ingredients: Achieving the Right Consistency
To start your journey toward making melt-in-your-mouth glazed donuts, it’s essential to focus on the dry ingredients first. Begin by sifting together the all-purpose flour, baking powder, salt, and nutmeg in a large bowl. Sifting not only ensures that these ingredients are well-combined but also aerates the flour, contributing to a lighter donut texture. The goal here is to achieve a smooth, lump-free mixture that will serve as the foundation of your donut dough.
When mixing your dry ingredients, pay close attention to the ratios. Too much flour can lead to dense donuts, while too little can cause them to spread during frying. Aim for a balanced consistency that feels neither too dry nor too sticky. Once your dry ingredients are ready, set them aside and prepare for the next step.
Combining Wet Ingredients: Tips for Smooth Blending
Now, turn your attention to the wet ingredients. In a separate mixing bowl, combine the eggs, milk, and melted butter. If you prefer a richer flavor, you can substitute whole milk or even buttermilk for a softer texture. Use a whisk to blend these ingredients until they are fully incorporated and smooth. This process ensures that your donuts will have a uniform flavor and texture throughout.
One tip for achieving a smooth blend is to allow your eggs and milk to come to room temperature before mixing. This helps them incorporate more easily and creates a more homogenous mixture. Additionally, avoid over-mixing at this stage; you only want to combine them until they are just blended.
Creating the Dough: Importance of Not Overmixing
Now that you have your wet and dry ingredients ready, it’s time to combine them. Pour the wet mixture into the bowl of dry ingredients, and gently fold them together using a spatula. The key here is to mix just until the flour is incorporated; overmixing can develop gluten in the flour, leading to tough donuts rather than the tender, melt-in-your-mouth texture we desire.
After combining, your dough should be slightly sticky but manageable. If it feels too wet, you can add a tablespoon of flour at a time until it reaches the right consistency. Cover the dough with plastic wrap and let it rest for about 10 minutes. This resting period allows the gluten to relax, making it easier to roll out.
Rolling and Cutting: Techniques for Shaping Donuts
Once the dough has rested, it’s time to roll it out. On a lightly floured surface, use a rolling pin to roll the dough to about ½ inch thickness. Ensure that your surface and rolling pin are floured to prevent sticking. This thickness is ideal for achieving the perfect donut texture—fluffy yet sturdy enough to hold the glaze.
To cut out the donuts, use a donut cutter or two round cookie cutters—one larger and one smaller for the center hole. Flour your cutters before each use to ensure a clean cut and easy release of the donuts. Carefully place the cut donuts on a parchment-lined baking sheet as you work, making sure they are not touching. Gather any scraps of dough, re-roll, and cut out additional donuts until all the dough is used.
Frying: Temperature Control and How to Avoid Common Frying Mistakes
Frying donuts can be tricky if you are not familiar with temperature control. Heat oil in a deep fryer or a large, heavy-bottomed pot to 350°F (175°C). Use a candy thermometer to monitor the temperature accurately. If the oil is too hot, the donuts will brown on the outside before cooking through on the inside; if it’s too cool, they will absorb too much oil and become greasy.
Carefully lower a few donuts into the hot oil, ensuring you don’t overcrowd the pot, which can cause the temperature to drop. Fry each donut for about 1-2 minutes per side, or until they are golden brown. Use a slotted spoon to turn them, and once they are cooked, transfer them to a wire rack lined with paper towels to drain excess oil.
Draining and Cooling: Ensuring the Best Texture
Once your donuts are fried to perfection, it’s crucial to let them cool properly. Place them on a wire rack to allow air to circulate around them, which helps maintain their texture. If you leave them on paper towels for too long, they can become soggy. Let them cool for about 5-10 minutes before glazing. This cooling period is essential as it helps the glaze adhere better to the surface of the donuts.
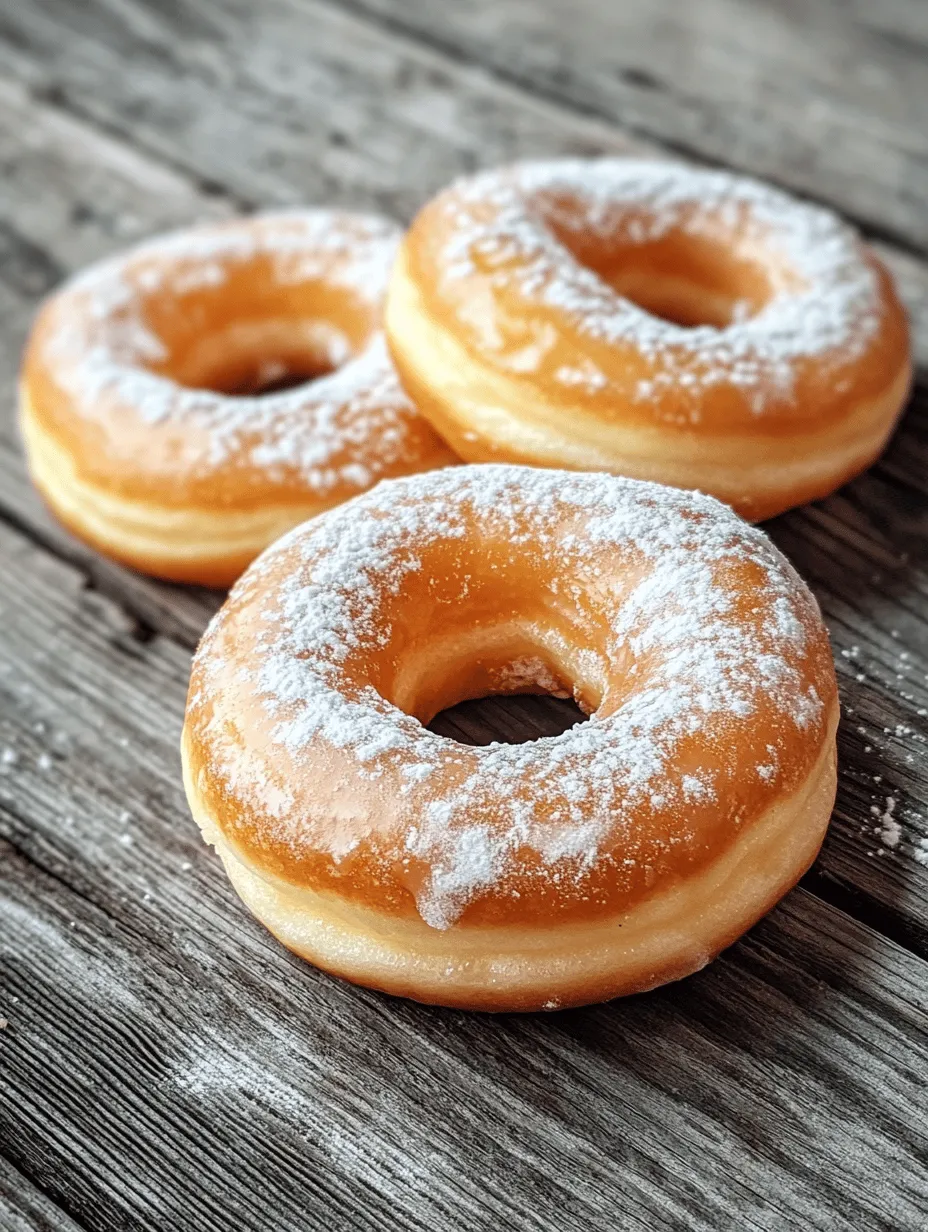
Creating the Perfect Glaze
The glaze is what elevates your donuts from ordinary to extraordinary. It adds sweetness and a glossy finish that makes them irresistible. A simple glaze can be made with powdered sugar, milk, and vanilla extract. Start by sifting 2 cups of powdered sugar into a mixing bowl. Gradually add 2-4 tablespoons of milk and a teaspoon of vanilla extract. Whisk until the mixture is smooth and free of lumps. The goal is to achieve a pourable consistency, so adjust the milk as needed.
Mixing Techniques for a Smooth Consistency
When mixing, start with less milk and add more as needed. If the glaze becomes too thin, you can always add more powdered sugar to thicken it up. This is particularly important if you want to achieve a thicker glaze that clings to the surface of your donuts.
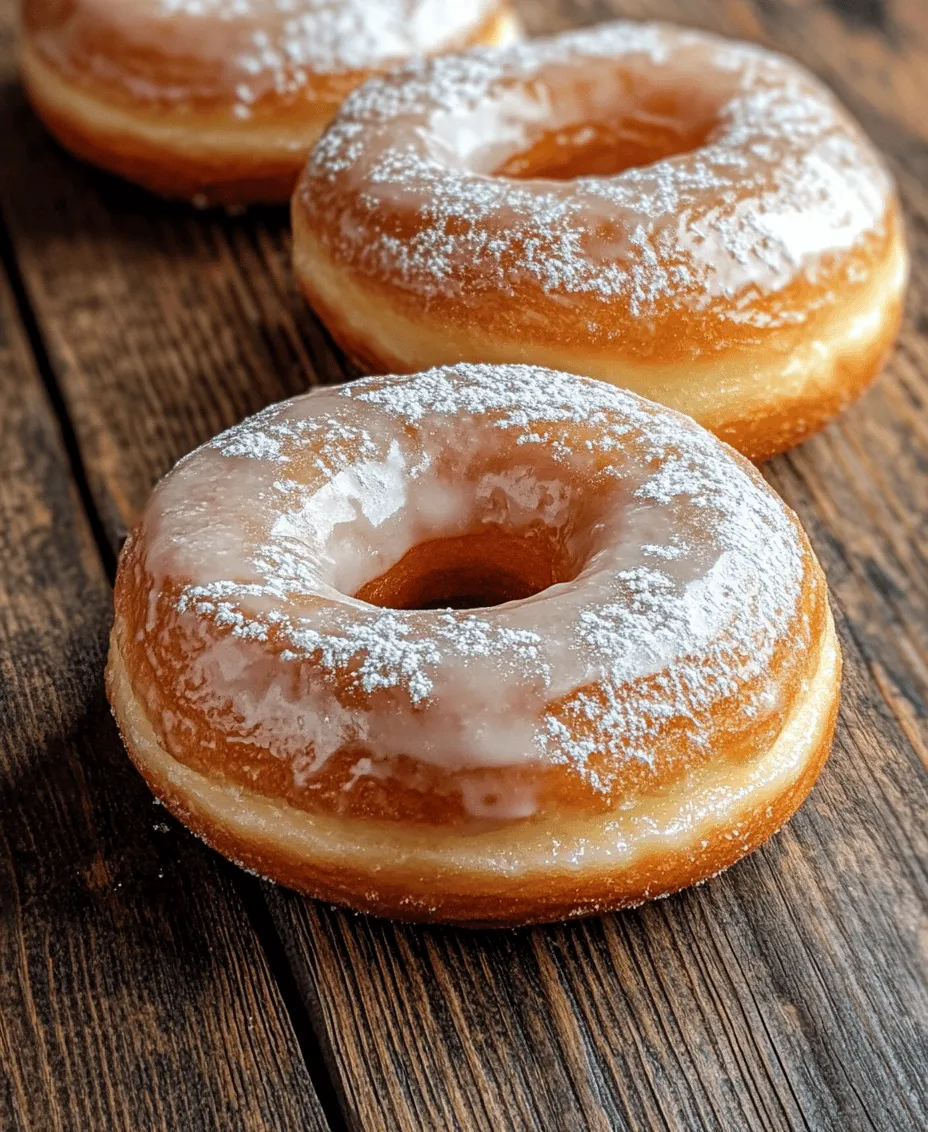
Timing: Glazing While Warm for Optimal Adherence
For the best results, glaze your donuts while they are still warm. This allows the glaze to melt slightly into the surface, creating a beautiful finish. Simply dip the top of each donut into the glaze, allowing any excess to drip off before placing them back on the wire rack.
Variations of Glazes That Can Be Made
Feel free to get creative with your glazes! You can infuse flavors by adding citrus zest, spices, or extracts. For a chocolate glaze, melt chocolate chips with a bit of butter and cream, stirring until smooth. You can also experiment with colored glazes using food coloring for festive occasions.
Serving Suggestions and Pairings
Homemade glazed donuts can be enjoyed in various ways. They are perfect for breakfast, served alongside a steaming cup of coffee or a glass of freshly squeezed orange juice. For dessert, consider pairing them with a scoop of vanilla ice cream or serving them on a dessert platter with fresh berries.
Beverage Pairings: Coffee, Tea, or Milk
When it comes to beverage pairings, the possibilities are endless. A rich, dark coffee balances the sweetness of the donuts beautifully. For tea lovers, a light Earl Grey or a chai latte can enhance the flavors of the donuts without overpowering them. If you prefer something more classic, a cold glass of milk can never go wrong.
Presentation Tips for Making the Donuts Visually Appealing
To make your donuts visually appealing, consider dusting them with a light sprinkle of powdered sugar or adding colorful sprinkles on top of the glaze. Arrange them on a cake stand or tiered platter for an inviting presentation. You can also garnish with fresh mint leaves or berries for a pop of color.
Storage and Shelf Life of Homemade Donuts
Homemade glazed donuts are best enjoyed fresh, but if you have leftovers, there are ways to store them without sacrificing quality. Keep them in an airtight container at room temperature for up to two days. If you want to extend their shelf life, you can refrigerate them for up to a week, although the texture might change slightly.
Best Practices for Storing Glazed Donuts to Maintain Freshness
To maintain freshness, avoid stacking glazed donuts on top of each other, as this can cause them to become sticky. Instead, place parchment paper between layers if you must stack them. For longer storage, you can freeze unglazed donuts. Wrap them individually in plastic wrap and place them in a freezer-safe bag. When you’re ready to enjoy them, simply thaw at room temperature and glaze them.
Discussion on How Long They Last and Tips for Reheating if Necessary
When it comes to reheating, place your donuts in a microwave for about 10 seconds to restore a bit of warmth. However, be cautious not to overheat, as this can make them tough. If you’ve stored them in the freezer, allow them to thaw overnight in the refrigerator before reheating.
Conclusion
There’s something undeniably joyous about making and enjoying homemade glazed donuts. The process is not only satisfying but also rewarding when you take that first bite of a soft, fluffy donut topped with a sweet glaze.
We encourage you to try this recipe and experience the delight of crafting your own donuts from scratch. Whether you stick to the classic glaze or explore new flavors, these donuts are sure to impress your family and friends.
We invite you to share your experiences or any variations of this recipe in the comments. Join our community and let us know how you made this delightful treat your own!