
Introduction
Valentine’s Day is a special occasion that celebrates love and affection, often marked by thoughtful gestures and shared moments. One of the most delightful traditions associated with this day is the act of sharing food. Whether it’s a romantic dinner, a cozy brunch, or a sweet treat, food has a unique way of bringing people together, creating lasting memories, and expressing heartfelt emotions. This year, why not add a touch of creativity to your Valentine’s Day feast with a charming and delicious recipe for heart-shaped breadsticks?
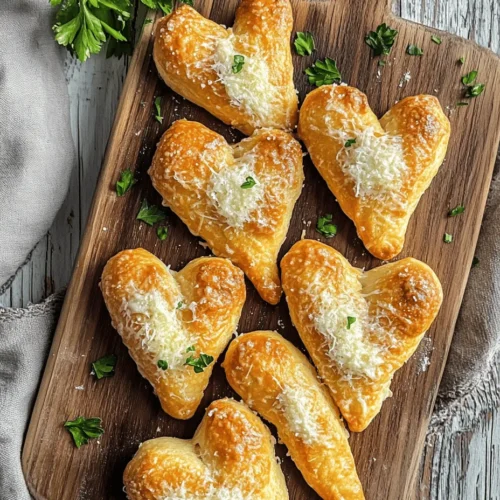
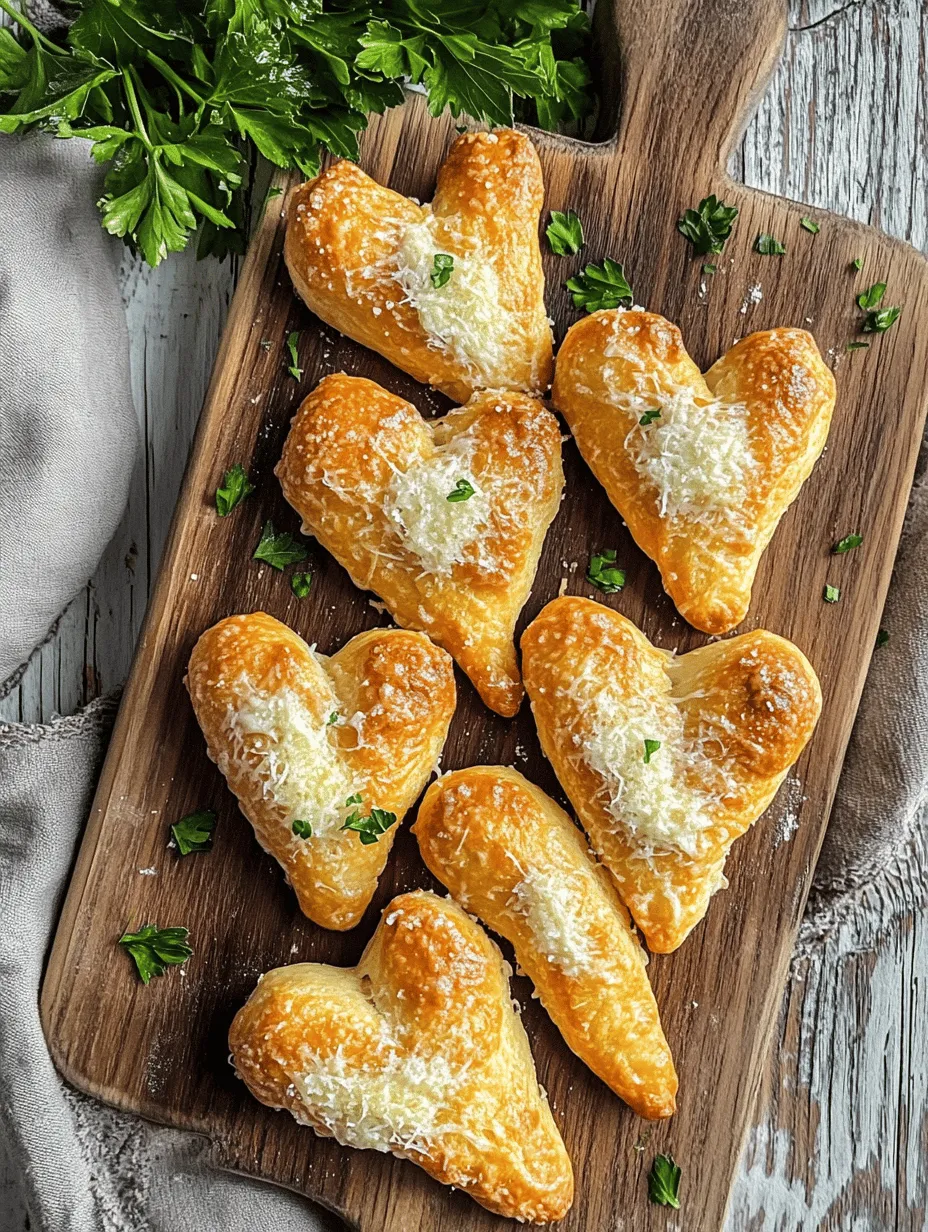
These whimsical breadsticks not only embody the spirit of love with their playful shape but also boast a delightful aroma and taste that will enhance any meal. Imagine serving fresh, warm breadsticks at dinner, their inviting scent wafting through the air as your loved ones gather around the table. They are perfect for dipping into marinara sauce, olive oil, or even a creamy cheese spread. Making these heart-shaped breadsticks is not just about feeding the body; it’s about nourishing the soul and creating a culinary experience that celebrates your affection.
In this article, we’ll guide you through the process of making these adorable heart-shaped breadsticks from scratch, ensuring that they are as fun to make as they are to eat. We’ll cover everything from the ingredients you’ll need to the step-by-step instructions for getting that perfect golden finish. So, roll up your sleeves, and let’s get started on this delightful baking adventure!
Understanding the Heart-Shaped Breadstick Recipe
Before we dive into the actual baking process, it’s essential to understand the role of each ingredient in making your heart-shaped breadsticks. By comprehending how each component contributes to the overall flavor, texture, and rise of the breadsticks, you can appreciate the artistry involved in baking.
Overview of the Ingredients
1. All-Purpose Flour: This is the backbone of your breadsticks. All-purpose flour provides the necessary structure and gluten, giving your breadsticks that chewy texture we all love. It’s versatile and can be used for various baked goods, making it a staple in most kitchens.
2. Sugar: While it might seem odd to include sugar in bread, it plays a crucial role in enhancing flavor and aiding yeast activation. Sugar feeds the yeast, encouraging it to produce carbon dioxide, which helps the dough rise and creates a light, airy texture.
3. Salt: This ingredient is vital for balancing flavors and strengthening gluten. Salt enhances the overall taste of the breadsticks and ensures that the yeast functions properly by regulating fermentation.
4. Active Dry Yeast: The star player in the bread-making process, yeast is responsible for fermentation. It converts sugars into carbon dioxide and alcohol, allowing the dough to rise and develop flavor. Active dry yeast needs to be activated before incorporating it into your dough.
5. Warm Water: This is the medium used to activate the yeast. The optimal temperature for yeast activation is between 100°F and 110°F. Too hot, and you risk killing the yeast; too cold, and the yeast will not activate properly.
6. Olive Oil: Adding olive oil to your dough contributes moisture and a rich flavor. It also helps create a tender texture in the breadsticks and enhances their overall taste.
7. Dried Italian Herbs: Incorporating dried herbs like oregano, basil, or thyme will elevate the flavor profile of your breadsticks, making them aromatic and fragrant.
8. Garlic: While optional, minced garlic can add an extra layer of flavor, making your breadsticks irresistible. Garlic pairs beautifully with the other ingredients and enhances the overall experience.
9. Egg Wash: An egg wash, made from beaten eggs, is brushed onto the breadsticks before baking to create a beautiful golden-brown finish. It gives the breadsticks a glossy appearance and enhances their visual appeal.
10. Grated Parmesan Cheese: Another optional ingredient, Parmesan cheese can be sprinkled on top of the breadsticks before baking for an added flavor boost. Its savory taste complements the herbs and garlic beautifully.
11. Fresh Herbs for Garnish: Adding fresh herbs as a garnish not only enhances the presentation but also adds a pop of color and freshness, making your heart-shaped breadsticks even more appealing.
The Joy of Baking from Scratch
Making breadsticks from scratch is a rewarding experience that allows you to connect with the ingredients and the process. There’s something inherently therapeutic about kneading dough, watching it rise, and finally shaping it into delightful hearts. It’s an opportunity to express your creativity and love through food, making it a perfect activity for Valentine’s Day. The hands-on experience of baking together can also be a lovely way to bond with your partner or family, turning an ordinary cooking session into a romantic or family-friendly event.
Gathering Your Ingredients
Now that you understand the importance of each ingredient, it’s time to gather everything you need to create your heart-shaped breadsticks. Here’s a detailed description of each ingredient and its significance in the recipe:
All-Purpose Flour
All-purpose flour is your go-to ingredient for this recipe. It provides the necessary structure and gluten for the breadsticks, creating a chewy and satisfying texture. When measuring flour, it’s essential to spoon it into your measuring cup and level it off with a knife to avoid packing, which can lead to dense breadsticks.
Sugar
Use granulated sugar to enhance the flavor of your breadsticks. A small amount is all you need to help activate the yeast and add a hint of sweetness. This subtle sweetness will balance the savory elements and make your breadsticks even more delicious.
Salt
Salt is crucial for flavor enhancement and gluten development. Use fine sea salt or table salt for even distribution within the dough. Avoid using too much salt, as it can inhibit yeast activity, leading to poor fermentation.
Active Dry Yeast
Ensure you have fresh active dry yeast for the best results. Check the expiration date on the package before using it, as stale yeast will not activate properly. If your yeast is fresh, it should bubble and foam when activated in warm water.
Warm Water
For activating the yeast, use warm water heated to about 100°F to 110°F. You can use a thermometer to check the temperature or test it with your wrist— it should feel warm but not hot. This temperature range is crucial for yeast activation.
Olive Oil
Opt for high-quality extra virgin olive oil for its rich flavor and health benefits. A tablespoon or two will add moisture to the dough, making it tender and flavorful.
Dried Italian Herbs
Choose a combination of dried herbs such as oregano, basil, and thyme to sprinkle into your dough. These herbs will infuse your breadsticks with a delightful aroma and taste, transporting you to an Italian bistro with every bite.
Garlic
If you decide to include garlic, use fresh cloves minced finely to release their flavor. You can adjust the amount based on your preference, but a couple of cloves should suffice for a subtle garlicky taste.
Egg Wash
For the egg wash, beat one egg with a tablespoon of water. This mixture will create a beautiful golden crust on your breadsticks, making them visually appealing and adding a rich flavor.
Grated Parmesan Cheese
If you love cheese, consider adding grated Parmesan on top of your breadsticks before baking. It will melt beautifully, creating a savory crust that complements the herbs and garlic perfectly.
Fresh Herbs for Garnish
To elevate your breadsticks’ presentation, garnish them with fresh herbs like parsley or basil after baking. This will add a pop of color and a fresh burst of flavor, making your heart-shaped breadsticks even more enticing.
Step-by-Step Guide to Making Heart-Shaped Breadsticks
Activating the Yeast
The first step in making your heart-shaped breadsticks is activating the yeast. This is a crucial process that ensures your breadsticks rise properly and develop the desired texture.
1. Measure the warm water: Start by measuring out the warm water in a small bowl. Make sure it’s at the right temperature (100°F to 110°F) for optimal yeast activation.
2. Add the sugar: Sprinkle the sugar into the warm water and stir gently until it dissolves. The sugar acts as food for the yeast, which will encourage it to activate.
3. Sprinkle the yeast: Next, sprinkle the active dry yeast over the surface of the water. Do not stir; allow it to sit undisturbed for about 5-10 minutes. During this time, the yeast will begin to bubble and foam, indicating that it is alive and ready to be used.
4. Check for bubbles: After the resting period, you should see a frothy layer on top of the water. This is a sign that the yeast is active and ready to be incorporated into your dough.
In the next part of this article, we will delve into the remaining steps of making these delightful heart-shaped breadsticks, guiding you through the mixing, kneading, shaping, and baking processes to ensure that your creation is not only visually stunning but also deliciously enjoyable. Stay tuned as we continue this culinary journey toward a perfect Valentine’s Day treat!
Making the Dough
To create delightful heart-shaped breadsticks, the first step is making the dough. This is where the magic begins. Start by combining your dry ingredients: flour, yeast, salt, and sugar. Using a large mixing bowl, whisk these ingredients together until they are evenly distributed. The yeast is essential for leavening your breadsticks, while salt enhances flavor. Sugar feeds the yeast, promoting a good rise.
Next, it’s time to introduce the wet ingredients: warm water and olive oil. The water should be warm, not boiling, ideally around 110°F (43°C). This temperature is perfect for activating the yeast without killing it. Make a well in the center of your dry ingredients and pour in the warm water and olive oil. Using a wooden spoon or spatula, gradually mix the wet and dry ingredients. You are looking for a shaggy dough that begins to come together.
Kneading the Dough
Once your dough has formed, it’s time to knead. Kneading is a crucial step in gluten development, which gives bread its chewy texture. Turn your dough out onto a lightly floured surface and begin to knead by pushing the dough away from you with the heel of your hand, then folding it back over itself. Rotate the dough a quarter turn after each push. Knead for about 8-10 minutes until the dough is smooth and elastic.
You can tell you’ve kneaded enough when the dough springs back when poked and feels slightly tacky but not sticky. If the dough is too sticky, sprinkle in a bit more flour, but be careful not to overdo it, as too much flour can lead to dense breadsticks.
First Rise
After kneading, it’s time for the first rise, also known as fermentation. This is where the dough doubles in size, becoming light and airy. Place the kneaded dough in a greased bowl, turning it once to coat all sides with oil. Cover the bowl with a clean kitchen towel or plastic wrap to prevent it from drying out.
The ideal environment for rising is warm and draft-free. If your kitchen is cool, you can create a warm spot by preheating your oven for one minute, then turning it off and placing the dough inside. Allow it to rise for about 1 to 1.5 hours or until it has doubled in size.
Shaping Your Breadsticks
Once the dough has risen, it’s time to shape your breadsticks into hearts. First, punch down the dough to release any trapped air and turn it out onto a lightly floured surface. Divide the dough into equal portions, about the size of a golf ball. Roll each portion into a long rope, approximately 12 inches in length.
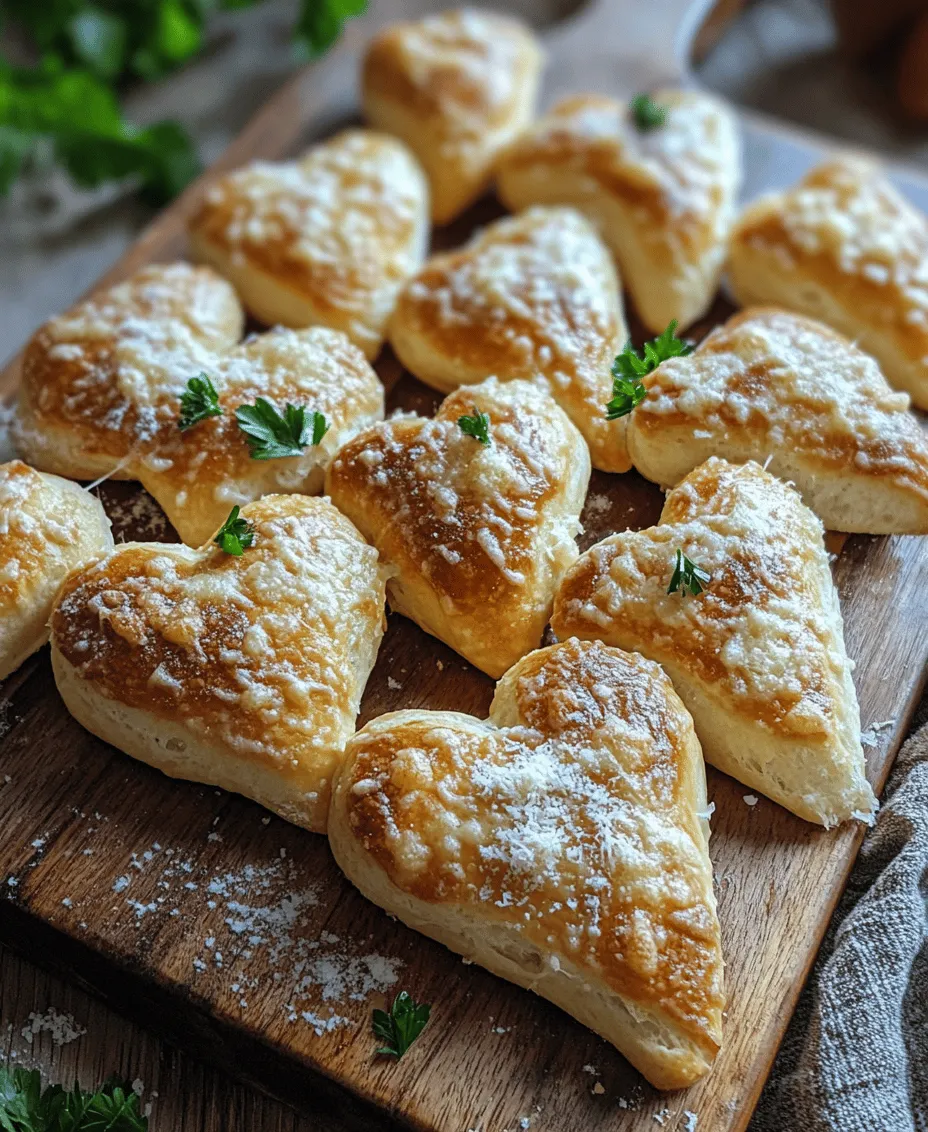
To form the heart shape, start by bending the top of the rope to create a point at the bottom. Then, take the two ends and bring them together to form the top of the heart, pinching the ends gently to secure the shape. Repeat this process with the remaining pieces of dough.
To ensure your heart shape remains intact during the second rise and baking, use a baking sheet lined with parchment paper. Place the shaped breadsticks on the baking sheet with enough space between them, as they will expand. Cover them again with a kitchen towel to allow for a second rise.
The Second Rise
The second rise, or proofing, is essential for developing flavor and texture. This rise typically lasts about 30 to 45 minutes. During this time, the dough continues to ferment, enhancing its taste. Preheat your oven during this phase to ensure it reaches the right temperature for baking.
For the best results, prepare your baking sheet by ensuring it is lined with parchment paper or lightly greased to prevent sticking. This preparation helps in achieving a golden-brown crust and allows for easy removal of the breadsticks post-baking.
Oven Preparation and Baking
Preheating your oven is crucial for proper baking. Set your oven to 375°F (190°C). A well-preheated oven helps the breadsticks rise quickly and evenly, leading to a light and airy texture.
While the oven heats, prepare an egg wash to give your breadsticks a beautiful golden sheen. In a small bowl, whisk together one egg with a tablespoon of water. This mixture will help create a lovely crust on your breadsticks. Brush the egg wash gently over the tops of the shaped dough right before baking.
When the oven is ready, place your baking sheet in the middle of the oven. Bake for approximately 15-20 minutes, or until the breadsticks are golden brown. You’ll know they are done when they sound hollow when tapped on the bottom and have a beautiful golden exterior.
Serving Suggestions and Pairings
Once your heart-shaped breadsticks are out of the oven, let them cool slightly before serving. These breadsticks can be enjoyed warm and make a charming addition to any Valentine’s Day meal. Consider serving them with a variety of dipping sauces such as marinara, garlic-infused olive oil, or flavored butter, like herb butter or honey butter, to enhance their flavor.
Pair these delightful breadsticks with Italian dishes such as pasta, salad, or a hearty soup. They also make a wonderful accompaniment to a romantic homemade pizza night. For an elegant presentation, arrange the breadsticks in a rustic basket lined with a red or pink napkin, adding a touch of Valentine’s flair.
Conclusion
Making heart-shaped breadsticks for Valentine’s Day is not just about baking; it’s about creating an experience filled with love and warmth. The joy of crafting these delightful treats from scratch can bring a special touch to your celebration. Whether shared with a loved one or enjoyed solo, these breadsticks represent the heartwarming essence of homemade food.
As you experiment with flavors and shapes in future baking endeavors, remember that the kitchen is a place of creativity and joy. Homemade breadsticks, with their inviting aroma and comforting texture, are sure to become a cherished tradition, bringing people together and creating wonderful memories. Celebrate love not just on Valentine’s Day, but every day, with the wholesome goodness of homemade bread.