
Introduction
Granola bars have rapidly gained popularity as a go-to snack for those seeking a healthy, convenient option. With a perfect balance of taste and nutrition, these bars can be found in lunchboxes, gym bags, and kitchen cabinets nationwide. They offer a delicious way to fuel your day, whether you’re tackling a busy morning or enjoying an afternoon pick-me-up. However, while store-bought versions are convenient, they often come with added sugars and preservatives that can detract from their health benefits.
This is where the beauty of homemade granola bars shines through. Making quick snacks at home not only gives you complete control over the ingredients but also allows you to tailor the flavors to suit your preferences. In this article, we’ll introduce you to a simple and efficient method for creating chewy peanut butter granola bars using just your microwave. With minimal prep time and a handful of basic ingredients, you can whip up a batch of these delightful snacks that are not only delicious but also nourishing.
The versatility of this recipe is one of its greatest strengths. Feel free to experiment with various mix-ins like dried fruits, seeds, or chocolate chips to create a granola bar that’s uniquely yours. Whether you’re a peanut butter fanatic or someone looking for a quick grab-and-go breakfast, this easy microwave recipe is bound to become a staple in your kitchen.
Understanding the Ingredients
Before diving into the preparation steps, let’s take a closer look at the main ingredients you’ll be using in this recipe. Each component plays a crucial role in contributing flavor, texture, and nutritional benefits.
Rolled Oats
Rolled oats serve as the base for our granola bars, providing a hearty, whole-grain foundation. They are a fantastic source of dietary fiber, which promotes digestive health and helps keep you feeling full longer. Additionally, oats are rich in essential vitamins and minerals, including manganese, phosphorus, and magnesium. Incorporating rolled oats into your diet can help regulate blood sugar levels, making them a great choice for sustained energy throughout the day.
Peanut Butter
Peanut butter is not only the star ingredient in this recipe but also a powerhouse of nutrition. It is packed with protein, which is essential for muscle repair and growth, making it a favorite among athletes and active individuals. The healthy fats found in peanut butter can contribute to heart health and provide a sense of fullness, helping to curb cravings. Furthermore, it adds a rich, creamy flavor that perfectly complements the chewy texture of the granola bars.
Sweeteners
In this recipe, we use natural sweeteners to enhance the flavor profile while keeping the bars wholesome. Honey and maple syrup are both excellent options, each bringing its unique taste and health benefits to the table.
– Honey is a natural humectant, meaning it helps retain moisture, resulting in a chewy texture. It also boasts antimicrobial and antioxidant properties, making it a nutritious choice.
– Maple Syrup, on the other hand, offers a distinct flavor that pairs beautifully with the nuttiness of the peanut butter. Rich in antioxidants and minerals like manganese and zinc, it serves as a fantastic alternative to processed sugars.
Both sweeteners allow for flexibility based on your dietary preferences or availability in your pantry, ensuring you can still create these tasty bars regardless of your choice.
Brown Sugar
Alongside the natural sweeteners, a bit of brown sugar is incorporated into the mixture. This ingredient not only enhances the sweetness but also contributes moisture, resulting in a chewy texture that is simply irresistible. Additionally, brown sugar contains molasses, which adds a hint of caramel-like flavor, enriching the overall taste of the granola bars.
Vanilla Extract
A splash of vanilla extract is included for its aromatic contribution. This ingredient enhances the flavor profile by adding a warm, sweet note that complements the nuttiness of the peanut butter and the sweetness of the granola bars. It’s a small addition that makes a significant difference in the overall taste.
Salt
While it may seem counterintuitive to add salt to a sweet recipe, a pinch of salt is essential for balancing flavors. It enhances the sweetness of the bars while rounding out the other ingredients, ensuring that each bite is perfectly flavored. Salt can also bring out the natural tastes of the oats and peanut butter, highlighting the deliciousness of this homemade snack.
Optional Ingredients
The beauty of this recipe lies in its versatility, allowing you to customize it to your liking. Consider adding chocolate chips, nuts, seeds, or dried fruits as mix-ins.
– Chocolate Chips can elevate the indulgence factor, making these bars a delightful treat.
– Nuts and seeds add a satisfying crunch and provide healthy fats, protein, and additional fiber.
– Dried fruits, such as cranberries or raisins, can introduce a burst of sweetness and chewiness, enhancing the overall texture.
Feel free to mix and match these optional ingredients based on your taste preferences and nutritional needs.
Step-by-Step Instructions
Now that we’ve explored the ingredients, let’s move on to the step-by-step instructions to create your Easiest Microwave Chewy Peanut Butter Granola Bars. Preparing these bars is simple and quick, making them an ideal choice for busy days.
Preparing the Peanut Butter Mixture
1. Gather Your Ingredients: Start by assembling all the ingredients in one place. This will streamline the process and ensure you don’t miss anything.
2. Microwave the Peanut Butter: In a microwave-safe bowl, add your measured peanut butter and any sweeteners you’ve chosen (honey, maple syrup, and brown sugar). Microwave the mixture on high for about 30 seconds. This step makes it easier to combine the ingredients.
3. Stir Thoroughly: After microwaving, stir the mixture until it is well combined. The heat will help soften the peanut butter and dissolve the brown sugar, creating a smooth, creamy base.
Incorporating Other Ingredients
4. Add Vanilla Extract and Salt: Next, stir in the vanilla extract and a pinch of salt. Mix until fully incorporated, as these ingredients will enhance the flavor profile of your granola bars.
5. Incorporate the Rolled Oats: Now, gradually add the rolled oats to the peanut butter mixture. Stir continuously to ensure that all the oats are evenly coated with the peanut butter mixture. This step is crucial as it will determine the texture of your bars.
6. Add Optional Ingredients: If you’re using any optional mix-ins, such as chocolate chips, nuts, or dried fruits, fold them into the mixture now. Make sure to distribute them evenly throughout the mixture for balanced flavor in every bite.
Preparing the Pan
7. Line Your Pan: To make removing the granola bars easier later, line an 8-inch square baking pan with parchment paper. Allow some overhang on the sides to help lift the bars out once they’ve set.
8. Transfer the Mixture: Pour the granola mixture into the prepared pan. Using a spatula or the back of a spoon, press the mixture down firmly into an even layer. This step is vital, as compacting the mixture helps the bars hold their shape once cooled.
Microwaving the Mixture
9. Microwave the Mixture: Place the pan in the microwave and heat for about 1 to 2 minutes. The goal is to warm the mixture enough to set it, but not so much that it becomes overly dry. Keep an eye on the mixture as it cooks.
10. Check for Doneness: After one minute, check the mixture. It should be slightly firm to the touch but still soft. If necessary, microwave for an additional 30 seconds, checking frequently to avoid overcooking.
Once the mixture reaches the desired texture, you can proceed to the next steps of cooling and slicing into bars. The result will be a batch of delicious, chewy peanut butter granola bars that are perfect for snacking any time of the day.
By following these straightforward steps, you’ll have a homemade snack that not only satisfies your hunger but also keeps you energized throughout the day. Whether you enjoy them as a breakfast option, a midday snack, or a post-workout treat, these granola bars are sure to be a hit.
Cooling and Cutting
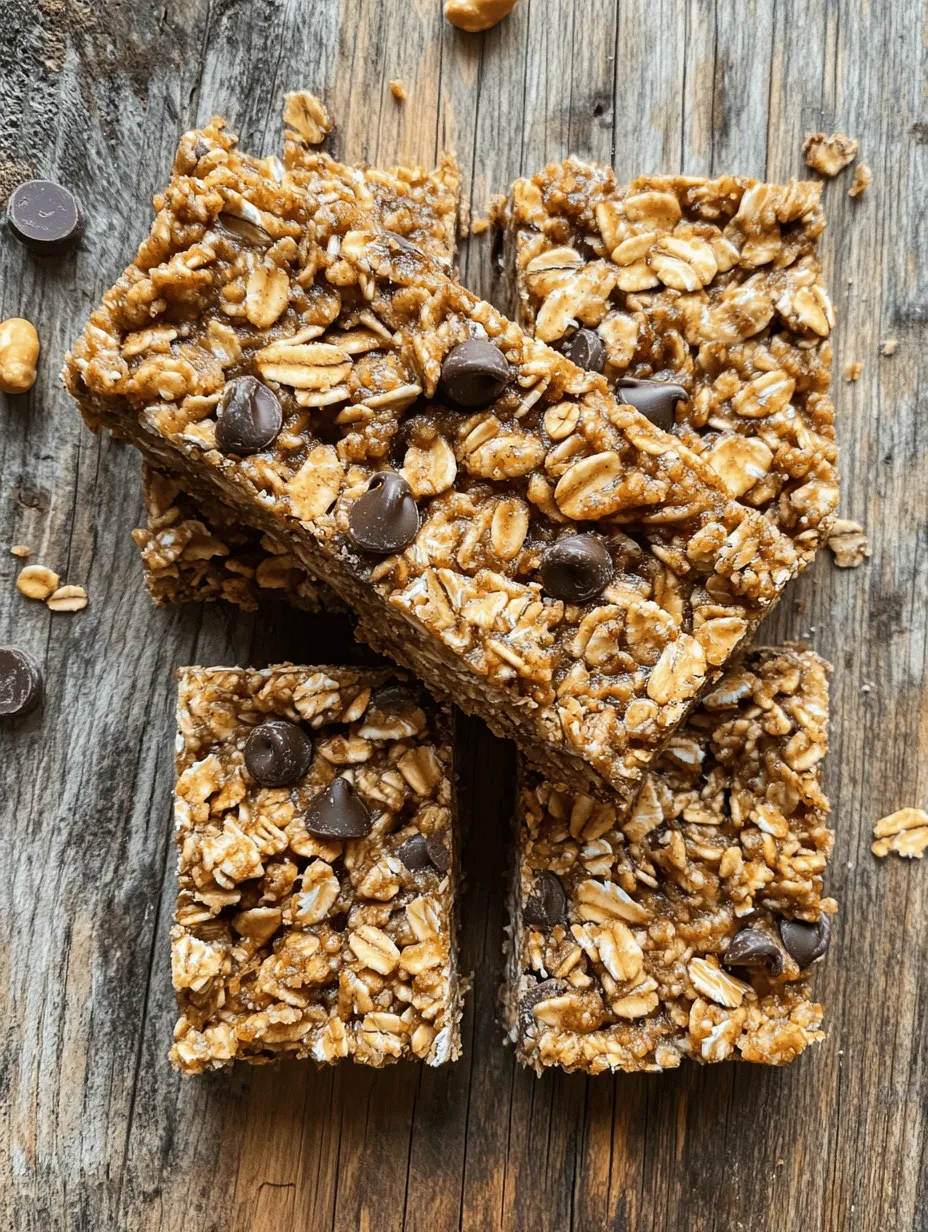
Once you’ve successfully microwaved your chewy peanut butter granola bars, the next step is crucial: cooling and cutting. Allowing the bars to cool properly ensures they set correctly and achieve the perfect chewy texture. Begin by letting the mixture sit in the microwave-safe dish for about 10 minutes at room temperature. After this initial cooling period, transfer the dish to the refrigerator and allow it to chill for an additional 30-60 minutes. This step is essential as it helps the bars firm up, making them easier to cut without crumbling.
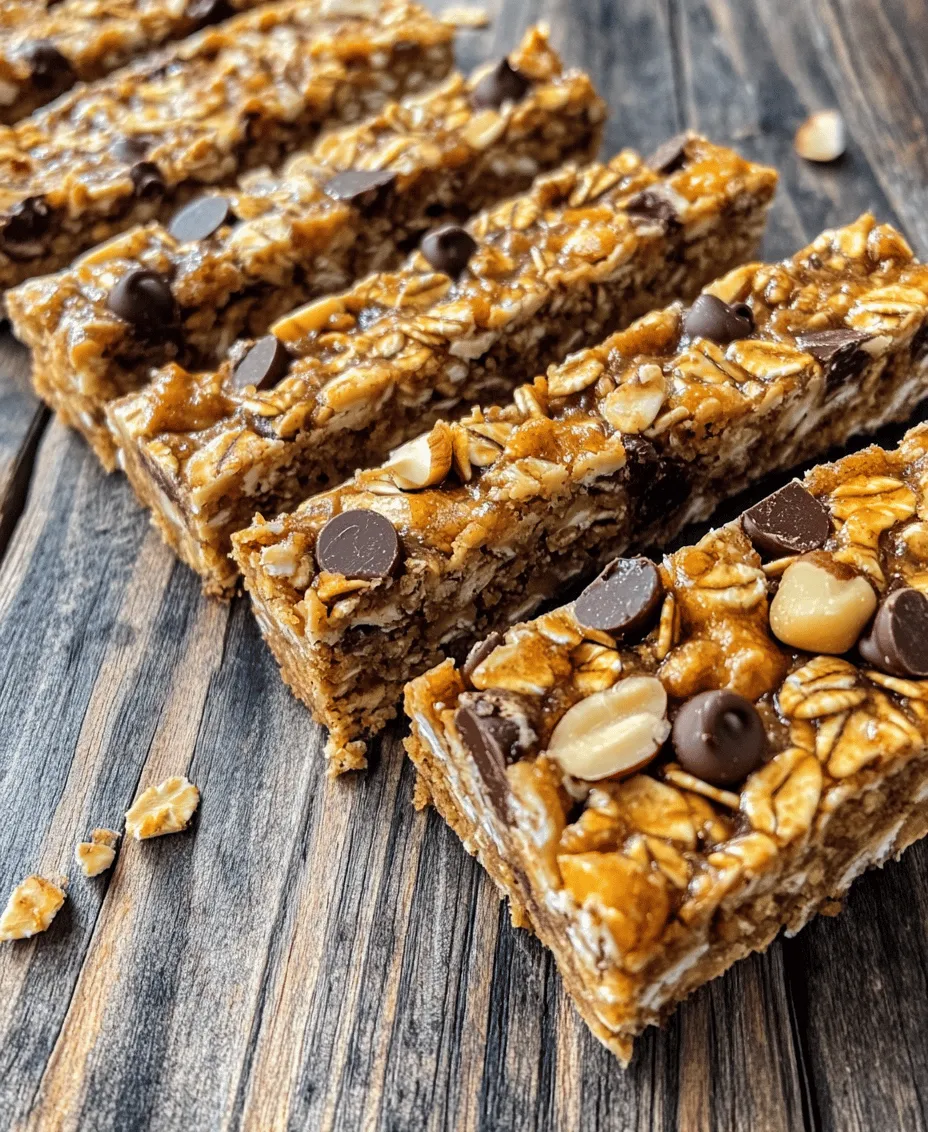
When it’s time to cut the bars, use a sharp knife to create clean edges. For uniformity, you can first score the top of the bars with light cuts to mark where you want to cut. Aim for rectangular or square shapes, depending on your preference, and keep in mind the size you want for snacking. If you prefer smaller bites, cut them into mini squares or bars. For an added touch, you can drizzle melted chocolate on top after cutting for a gourmet look.
Nutritional Information
Understanding the nutritional profile of your homemade peanut butter granola bars is important, especially if you are mindful of your dietary choices. Each serving (one bar) typically contains around 150-200 calories, which can vary based on the specific ingredients used. Here’s a breakdown of the nutritional content per serving:
– Calories: 150-200
– Protein: 5-7 grams
– Fats: 7-10 grams (primarily from peanut butter)
– Carbohydrates: 20-25 grams
– Fiber: 2-4 grams
These granola bars are not only delicious but also provide a good source of protein and healthy fats, making them a satisfying snack option. Furthermore, if you use gluten-free oats, these bars can easily fit into a gluten-free lifestyle. They are vegetarian-friendly, making them suitable for those who follow a plant-based diet. With their wholesome ingredients, these bars can serve as an energizing snack for athletes, busy professionals, or anyone looking for a nutritious treat.
Customization Options
One of the best aspects of making your own granola bars is the ability to customize them to suit your tastes. Here are several options to consider:
Flavor Variations
To enhance the flavor profile of your granola bars, consider adding spices such as cinnamon or nutmeg. A teaspoon of cinnamon can bring warmth and depth, while nutmeg can add a hint of sweetness and complexity. Experimenting with different spice combinations can result in a unique flavor experience that keeps your snacks exciting.
Alternative Nut Butters
While peanut butter is a classic choice, you can switch things up by using other nut butters. Almond butter offers a slightly sweeter and nuttier flavor, while cashew butter is creamy and mild, perfect for those who prefer a more subtle taste. Each nut butter brings its unique texture and flavor, making it easy to create variations of your granola bars.
Add-ins
Incorporate a variety of add-ins to tailor your bars to your liking. Dried fruits like cranberries, apricots, or raisins can introduce sweetness and chewiness. For added crunch, toss in seeds such as chia, flaxseed, or pumpkin seeds. You might also consider using different types of nuts, like walnuts or pecans, to create varied textures and flavors.
Storage and Shelf Life
Proper storage is key to maintaining the freshness of your granola bars. If you plan to consume them within a week, you can store them at room temperature in an airtight container. Just ensure they are kept in a cool, dry place away from direct sunlight, as heat can cause them to become sticky or lose their texture.
For longer shelf life, consider refrigerating the bars, which can extend their freshness up to two weeks. When refrigerated, the bars may become firmer, providing a satisfying crunch. If you prefer a softer texture, simply let them sit at room temperature for a few minutes before enjoying. For even longer storage, you can freeze the bars. Wrap each bar individually in plastic wrap or place them in a freezer-safe container. They can last up to three months in the freezer, making them perfect for meal prep or emergency snacks.
Serving Suggestions
These versatile granola bars can be enjoyed in various ways, making them a fantastic addition to your snack repertoire. Here are some serving suggestions:
– Pairing with Beverages: Serve your granola bars alongside a smoothie or a glass of milk for a balanced snack that includes protein and carbohydrates. They also complement herbal teas or coffee nicely for those morning or afternoon breaks.
– Breakfast Options: Crumble the bars over yogurt or serve them with a side of fresh fruit for a nutritious breakfast. This combination can enhance the flavor and add additional fiber and vitamins to your meal.
– Post-Workout Fuel: The protein and carbs in these bars make them an excellent post-workout snack. Pair them with a protein shake to replenish energy and help muscle recovery.
– Creative Serving Ideas: Get inventive with your granola bars! You can crumble them into a parfait with layers of yogurt and berries, or incorporate them into dessert recipes by using crumbled bars as a crust for a cheesecake or a topping for ice cream.
Conclusion
Making homemade granola bars in the microwave is not only easy but also incredibly satisfying. The ability to customize flavors and ingredients means you can create a snack that fits your dietary needs while still being delicious. With their nutritious profile and versatility, these chewy peanut butter granola bars are perfect for any occasion, whether it’s a quick breakfast, an after-school snack, or a post-gym pick-me-up.
We encourage you to try this recipe and explore your variations, from different nut butters to unique add-ins. The joy of homemade snacks lies in the creativity and personalization they allow, so get experimenting! Enjoy the satisfaction of knowing exactly what goes into your bars, and share them with friends and family to spread the love of healthy snacking.
