
Introduction
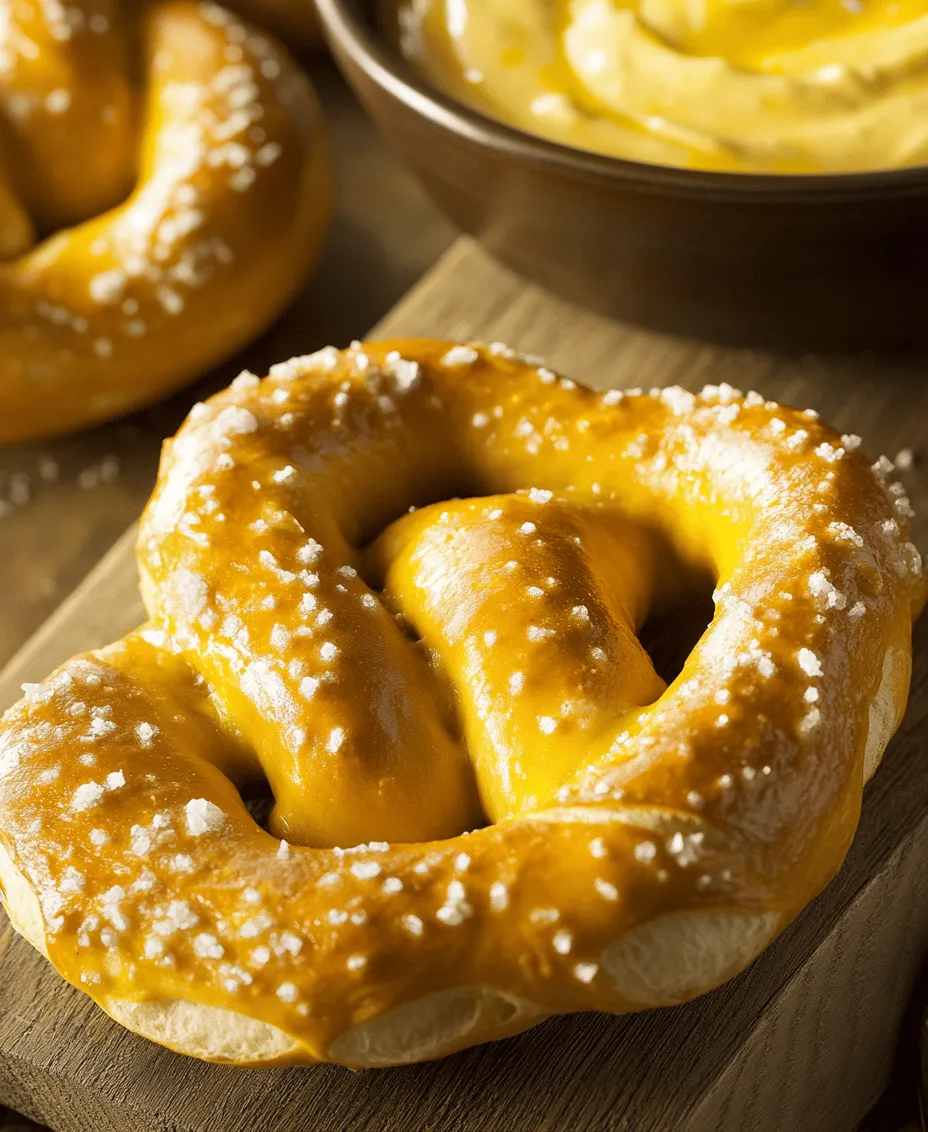
Soft pretzels have long been a beloved treat, capturing the hearts of snack enthusiasts and food lovers alike. Their warm, golden-brown exterior, coupled with a soft, chewy interior, creates a sensory experience that is hard to resist. Whether enjoyed at a local fair, a sporting event, or simply as a delightful snack at home, these twisted delights hold a special place in the culinary world.
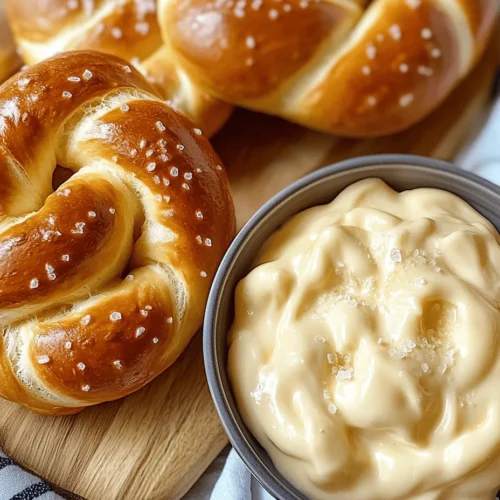
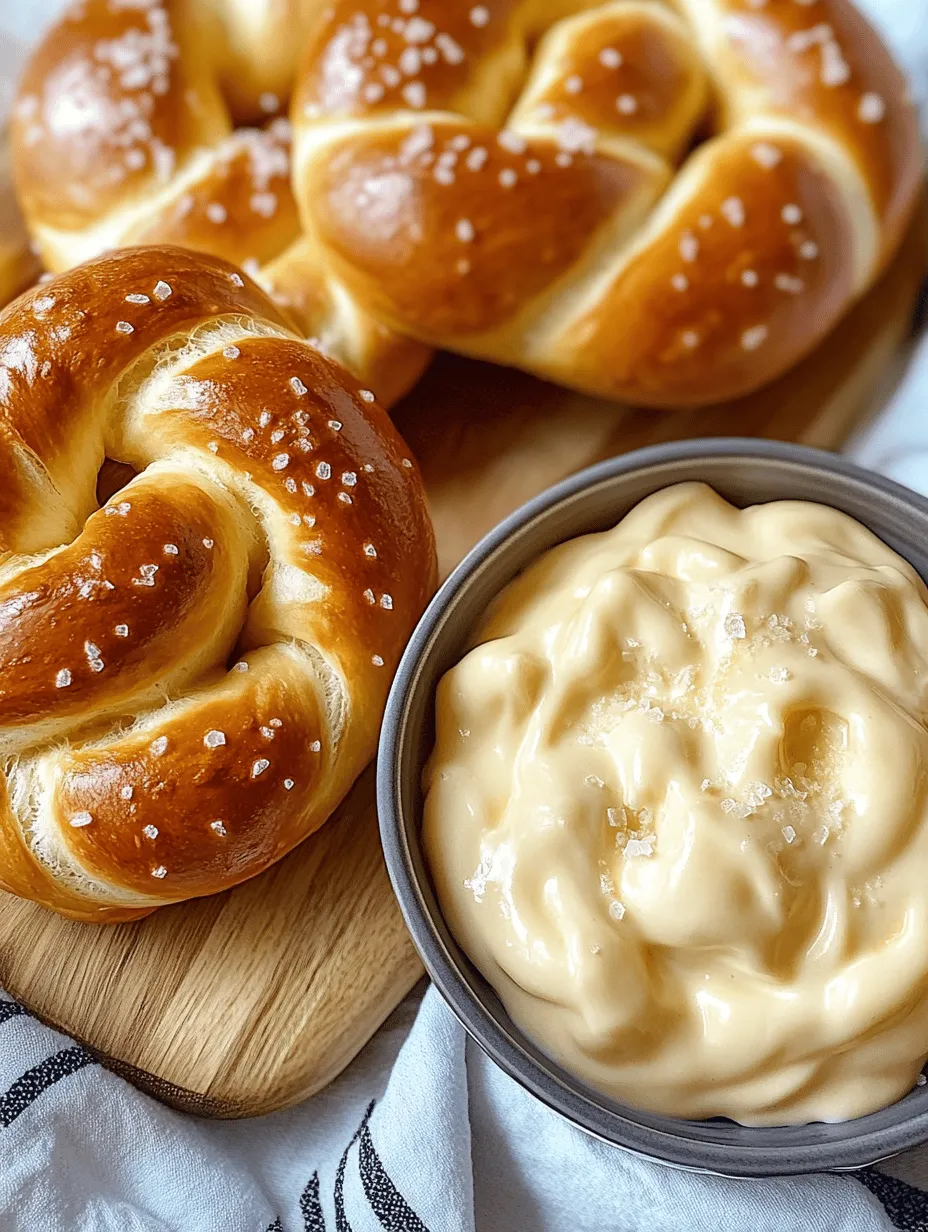
The combination of soft pretzels with a rich, cheesy dip elevates this classic snack to new heights. This pairing not only enhances the pretzel’s flavor but also transforms it into a crowd-pleasing appetizer that is perfect for sharing at gatherings or enjoying during a cozy movie night. The creamy, cheesy goodness complements the salty pretzel beautifully, making each bite an unforgettable indulgence.
While store-bought pretzels are convenient, nothing compares to the satisfaction of making them from scratch. Homemade soft pretzels allow you to control the ingredients, ensuring a fresher and tastier result. Plus, the process of kneading the dough and watching it rise offers a rewarding experience that brings a sense of accomplishment. In this article, we will guide you through the steps of creating your own Twisted Joys, complete with a cheesy dip that will make your taste buds sing.
The Joy of Homemade Soft Pretzels
Creating soft pretzels at home is more than just a cooking project; it’s a culinary adventure that rewards you with delicious results. The joy of making pretzels from scratch lies in the tactile experience of handling the dough. Kneading the ingredients together, watching the dough rise, and shaping it into twists brings a sense of connection to the food you are preparing. This hands-on experience not only enriches your cooking skills but also deepens your appreciation for the art of baking.
Homemade snacks also offer a range of nutritional benefits. By preparing your pretzels, you can use high-quality ingredients and control the amount of salt and sugar, catering to your dietary preferences. For those who are health-conscious, making pretzels at home means you can experiment with whole-grain flours, add seeds or herbs for extra flavor, or create a cheese dip that uses lighter ingredients. This flexibility allows you to indulge without compromising on health.
Pretzels are incredibly versatile, making them an excellent choice for any occasion. They can be enjoyed warm with a variety of toppings, from coarse sea salt to aromatic herbs. Furthermore, soft pretzels pair beautifully with an array of dips, such as mustard, marinara sauce, or the irresistible cheesy dip we’ll be making alongside them. This adaptability means that soft pretzels can easily transition from a simple snack to a gourmet appetizer or a fun party treat.
Understanding the Ingredients
To create the perfect soft pretzels, it’s essential to understand the role of each ingredient in the recipe. Let’s break down the key components that contribute to the texture, flavor, and overall success of your pretzels.
All-Purpose Flour
All-purpose flour serves as the foundation of the pretzel dough. Its moderate protein content provides the necessary structure and chewiness that characterizes the ideal soft pretzel. When mixed with water and other ingredients, the flour forms gluten, which is crucial for creating a stretchy and elastic dough. This elasticity allows the pretzels to hold their shape during shaping and baking.
Active Dry Yeast
Active dry yeast is the leavening agent that gives pretzels their delightful rise. When activated, it ferments the sugars present in the dough, producing carbon dioxide gas that causes the dough to expand. This process not only contributes to the light and airy texture of the pretzels but also enhances their flavor through fermentation. It’s essential to properly activate the yeast in warm water to ensure it works effectively.
Sugar
Adding sugar to the pretzel dough serves multiple purposes. Firstly, it enhances the flavor, providing a touch of sweetness that balances the saltiness of the pretzel. Secondly, sugar aids in the fermentation process by feeding the yeast, promoting a better rise. This results in a lighter and fluffier pretzel.
Salt
Salt is a crucial ingredient in the pretzel dough for several reasons. It not only enhances the flavor of the pretzels but also plays a role in controlling yeast activity. The right amount of salt helps to strengthen the gluten structure, resulting in a well-textured pretzel. However, it’s important to measure the salt accurately, as too much can inhibit the yeast and lead to dense pretzels.
Cheese Dip Ingredients
A cheesy dip can elevate your soft pretzels to a whole new level. Here’s a brief overview of the ingredients that will create a creamy and flavorful dip.
– Sharp Cheddar Cheese: The star of the cheese dip, sharp cheddar provides a rich, tangy flavor and melts beautifully, making it the perfect companion for soft pretzels.
– Cream Cheese: This ingredient adds creaminess and a smooth texture to the dip, creating a luscious mouthfeel that contrasts beautifully with the pretzel’s chewiness.
– Milk: Used to adjust the consistency of the dip, milk helps achieve the desired creaminess and pourability, ensuring that it clings to each pretzel.
– Dijon Mustard and Spices: These ingredients infuse the dip with depth and complexity. Dijon mustard adds a subtle tanginess, while spices can enhance the flavor profile, making each bite more exciting.
Step-by-Step Guide to Making Soft Pretzels
Preparing the Pretzel Dough
Now that we’ve discussed the ingredients, let’s dive into the first steps of preparing your soft pretzel dough. This process is straightforward and rewarding, perfect for both novice and experienced bakers.
1. Activating the Yeast: Start by measuring out warm water (around 110°F or 43°C) in a small bowl. Add a teaspoon of sugar and sprinkle the active dry yeast over the top. Let the mixture sit for about 5 to 10 minutes until it becomes frothy. This step is crucial because it indicates that the yeast is alive and ready to work its magic in the dough.
2. Mixing the Dough: In a large mixing bowl, combine the all-purpose flour and salt. Once the yeast has activated, pour the yeast mixture into the flour mixture. Stir with a wooden spoon or spatula until the ingredients begin to come together.
3. Kneading the Dough: Transfer the dough onto a lightly floured surface. Knead the dough for about 5 to 7 minutes until it becomes smooth and elastic. This is an important step, as proper kneading develops the gluten, which gives the pretzels their signature texture. If the dough feels sticky, sprinkle a little more flour as needed.
4. Letting the Dough Rise: Once kneaded, shape the dough into a ball and place it in a lightly greased bowl. Cover the bowl with a clean kitchen towel or plastic wrap, and let it rise in a warm, draft-free area for about 1 to 1.5 hours or until it has doubled in size. This rising process allows the yeast to work, resulting in a light and airy pretzel.
5. Shaping the Pretzels: After the dough has risen, punch it down gently to release any air bubbles. Turn the dough out onto a floured surface and divide it into equal portions, typically eight pieces. Roll each piece into a long rope, about 20 to 24 inches in length. From here, twist the rope into the classic pretzel shape, crossing the ends over each other and then folding them back towards the center.
As you prepare the pretzel dough, the aroma of freshly baked bread will begin to fill your kitchen, setting the stage for the delicious treats that await. The next steps will involve boiling the shaped pretzels before baking them to achieve that signature crust and golden color, but for now, take pride in the dough you have created and the journey that lies ahead.
Stay tuned for the continuation of this recipe, where we will delve into the boiling process, baking, and, of course, making that indulgent cheesy dip that will accompany your Twisted Joys perfectly.
Shaping the Pretzels
Shaping the pretzels is an essential step that transforms your dough into the iconic twisted form beloved by many. To start, divide your well-risen dough into equal portions. A standard size is about 2 to 3 ounces per pretzel, but you can adjust this based on your preference for smaller or larger pretzels.
Techniques for Achieving the Perfect Pretzel Shape
1. Rolling the Dough: Begin by rolling each portion into a long rope about 24 inches long. It’s crucial to ensure that the thickness of the rope is consistent throughout to promote even cooking.
2. Twisting: Once you have your rope, lay it down in a U-shape. Cross the ends over each other to form an ‘X’ in the middle. Then, bring the ends down and tuck them under the loop of the U. This creates the traditional pretzel shape. Practice makes perfect, so don’t get discouraged if your first few attempts aren’t perfect.
3. Visual Cues for Dough Readiness: The dough should be smooth and elastic. If it tears easily or feels too sticky, it may need more flour. Conversely, if it feels too dry, a little water can help achieve the right texture. A good rule of thumb is that the dough should spring back when lightly pressed.
Boiling the Pretzels
After shaping, the next step is boiling your pretzels. This crucial process helps develop the distinctive chewy texture that defines soft pretzels.
Explanation of the Baking Soda Bath and Its Purpose
Prepare a large pot of water and add a generous amount of baking soda—about 1/2 cup per gallon of water. The alkaline nature of baking soda gives pretzels their characteristic dark brown crust and unique flavor. Boiling the pretzels for about 30 seconds on each side will set their shape and enhance their chewiness.
Safety Tips for Boiling Pretzels
– Use Caution: Boiling water can be hazardous, so take care not to splash. Use a slotted spoon to gently lower the pretzels into the water.
– Batch Processing: Depending on your pot size, boil the pretzels in batches to avoid overcrowding, which can lead to uneven cooking.
– Don’t Overboil: Keep an eye on the timer; overcooking can lead to a rubbery texture.
Baking the Pretzels
Once boiled, it’s time to bake those pretzels to golden perfection.
Optimal Oven Settings and Baking Times for Perfect Color and Texture
Preheat your oven to 425°F (220°C). Line a baking sheet with parchment paper for easy cleanup. Arrange the boiled pretzels on the sheet, leaving space between them for expansion. Bake for about 12-15 minutes or until they’re beautifully browned. The high temperature allows for a crusty exterior while keeping the inside soft and fluffy.
The Significance of Sprinkling Coarse Sea Salt
After removing the pretzels from the oven, brush them with melted butter and immediately sprinkle coarse sea salt on top. The butter adds flavor and helps the salt adhere, bringing that classic pretzel taste that pairs perfectly with your cheese dip.
Creating the Cheese Dip
While the pretzels are baking, you can prepare a delicious cheese dip to accompany them.
Step-by-Step Process of Preparing Cheese Dip
1. Ingredients: Gather your ingredients: 8 ounces of cream cheese, 1 cup of shredded cheddar cheese, 1/2 cup of milk, and 1 tablespoon of Dijon mustard.
2. Melting the Cheese: In a saucepan over medium heat, add the cream cheese. Stir continuously to prevent it from sticking or burning. Gradually add the milk, mixing until smooth.
3. Achieving the Right Consistency: Once the cream cheese is fully melted, add the shredded cheddar cheese. Stir until melted and the dip reaches a creamy consistency. If too thick, add more milk, a tablespoon at a time, until desired thickness is reached.
4. Balancing Flavors: Stir in the Dijon mustard and season with salt, pepper, or your favorite spices. This will add depth to the flavor, making your cheese dip irresistible.
Serving Suggestions
Presentation can elevate your soft pretzels and cheese dip from a simple snack to an impressive appetizer.
Presentation Ideas for Serving Pretzels and Cheese Dip
– Serve the pretzels in a rustic basket lined with parchment paper, accompanied by a small bowl of cheese dip.
– Garnish the cheese dip with a sprinkle of paprika or a drizzle of olive oil for a touch of color.
– Consider adding a side of mustard or a colorful salsa to complement the cheese dip.
Pairing Suggestions with Beverages
– Pretzels pair wonderfully with beverages like craft beer, hard cider, or sparkling water. The carbonation in these drinks contrasts beautifully with the dense texture of the pretzel, enhancing the overall experience.
– For a non-alcoholic option, consider serving with a refreshing homemade lemonade or iced tea.
Creative Ways to Enjoy Leftover Pretzels or Cheese Dip
– Pretzel Croutons: Cut leftover pretzels into cubes, toast them in the oven, and use them as croutons for salads or soups.
– Cheese Dip Enhancements: Mix leftover cheese dip with cooked pasta for a quick mac and cheese or use it as a creamy base for a casserole.
The Cultural Significance of Pretzels
Pretzels have a rich history, originating in ancient times and evolving into beloved snacks around the world.
A Brief History of Pretzels in Different Cultures
The origins of pretzels can be traced back to ancient Rome, where they were made as a reward for children who learned their prayers. The shape is often interpreted as arms crossed in prayer. Over time, pretzels became popular in various cultures, particularly in Germany, where they were commonly enjoyed at festivals and gatherings.
The Evolution of Pretzel Recipes Over Time
From their humble beginnings, pretzel recipes have evolved significantly, especially in the U.S. where soft pretzels gained popularity at fairs and street vendors. Innovative variations now exist, including stuffed pretzels, pretzel buns, and even dessert pretzels topped with sweet toppings.
Fun Facts About Pretzels and Their Popularity at Events and Gatherings
– Soft pretzels are often associated with Oktoberfest and are a staple at sporting events.
– The world’s largest pretzel, measuring over 26 feet long, was made in 2017 in Pennsylvania, showcasing the cultural significance of this snack.
Conclusion
Making soft pretzels with a cheesy dip is not just about creating a delicious snack; it’s about crafting an experience that brings joy and satisfaction. The process of kneading, shaping, boiling, and baking these pretzels is a rewarding endeavor that results in a treat perfect for any occasion.
As you enjoy your homemade pretzels, consider experimenting with different cheeses or spices in your dip, or even try adding toppings to your pretzels for extra flair. The joy of creating and sharing these treats will undoubtedly spark fond memories and inspire future culinary adventures. So gather your loved ones, whip up a batch of these delightful pretzels, and enjoy the satisfaction that comes from homemade treats.