Introduction
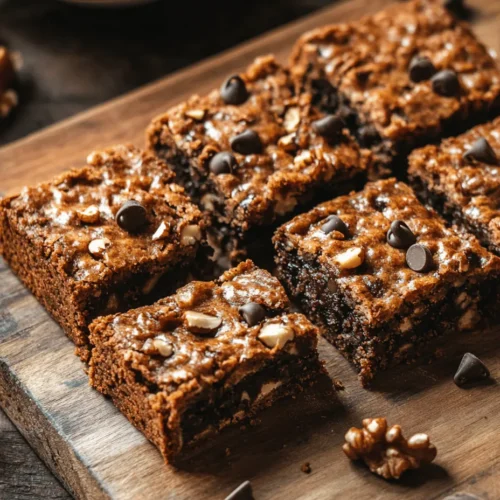
Banana-based desserts have captured the hearts of many bakers and dessert lovers alike, thanks to their natural sweetness, moist texture, and versatility. From classic banana bread to decadent banana cream pie, these delightful treats have become a staple in kitchens around the world. However, one dessert that stands out in the realm of banana-inspired confections is the Choco-Banana Bliss Bars. This recipe masterfully combines the rich flavors of chocolate and the creamy sweetness of ripe bananas, creating a dessert that is both indulgent and satisfying.
The appeal of chocolate and bananas is undeniable. The slight bitterness of dark chocolate perfectly complements the sweet, mellow flavor of ripe bananas, resulting in a harmonious balance that tantalizes the taste buds. Not only do these two ingredients marry well together in terms of flavor, but they also offer a unique texture. The softness of the bananas provides moisture and density, while the chocolate chips add a delightful contrast with their melted, gooey goodness.
Moreover, these bars are not just about taste; they also pack a nutritional punch. Bananas are rich in potassium and vitamins, while the addition of nuts can provide healthy fats and protein. This makes Choco-Banana Bliss Bars a more wholesome option than many traditional desserts, allowing you to indulge without the guilt. In this recipe, you can expect a straightforward yet rewarding baking experience that results in bars that are perfect for snacking, dessert, or even breakfast on the go.
Understanding the Ingredients
To create the perfect batch of Choco-Banana Bliss Bars, it’s essential to understand the role of each ingredient. This insight not only helps you appreciate the recipe but also allows you to make informed substitutions if necessary.
Ripe Bananas
The star ingredient of this recipe is ripe bananas. Their natural sweetness and moisture are crucial to the success of the bars. Ripe bananas break down easily, creating a smooth batter that lends itself to a tender texture. The sugar content in ripe bananas increases as they mature, making them perfect for baking. When selecting bananas for this recipe, look for ones with a few brown spots, indicating they are at their peak sweetness.
Unsalted Butter
Unsalted butter is used in this recipe to add richness and enhance the overall flavor of the bars. The butter also contributes to the moistness of the final product, creating a tender crumb. Unsalted butter is preferred in baking because it allows you to control the amount of salt in the recipe, ensuring a balanced flavor profile.
Brown Sugar
Brown sugar plays a vital role in this recipe by providing a deeper flavor profile compared to traditional white sugar. The molasses content in brown sugar not only adds moisture but also lends a rich caramel flavor that complements the bananas and chocolate beautifully. Using a combination of brown sugar and white sugar can help achieve the perfect sweetness level and texture.
Egg
The egg in this recipe acts as a binder, helping to hold the ingredients together while adding moisture. It also contributes to the overall structure of the bars, ensuring they don’t crumble apart. For those looking for a vegan alternative, a flaxseed meal or applesauce can be used as a substitute.
Vanilla Extract
Vanilla extract is a key flavor enhancer in many baked goods, and Choco-Banana Bliss Bars are no exception. A splash of vanilla extract elevates the overall flavor profile, making the bars more aromatic and inviting. It complements the sweetness of the bananas and adds depth to the chocolate flavor.
All-Purpose Flour
All-purpose flour serves as the backbone of the bars, providing structure and stability. It helps the bars rise and maintain their shape during baking. When measuring flour, be sure to spoon it into the measuring cup and level it off to avoid adding too much, which can lead to dense bars.
Baking Powder and Baking Soda
These leavening agents are essential for achieving a light and fluffy texture. Baking powder helps the bars rise by creating carbon dioxide bubbles during baking, while baking soda reacts with the acidity of the bananas to aid in leavening. Together, they ensure that the Choco-Banana Bliss Bars are not overly dense, allowing for a delightful bite.
Salt
A pinch of salt is included in the recipe to balance the sweetness and enhance the flavors of the other ingredients. Salt brings out the natural sweetness of the bananas and chocolate, making each bite richer and more satisfying. It’s a small but crucial ingredient that should never be overlooked.
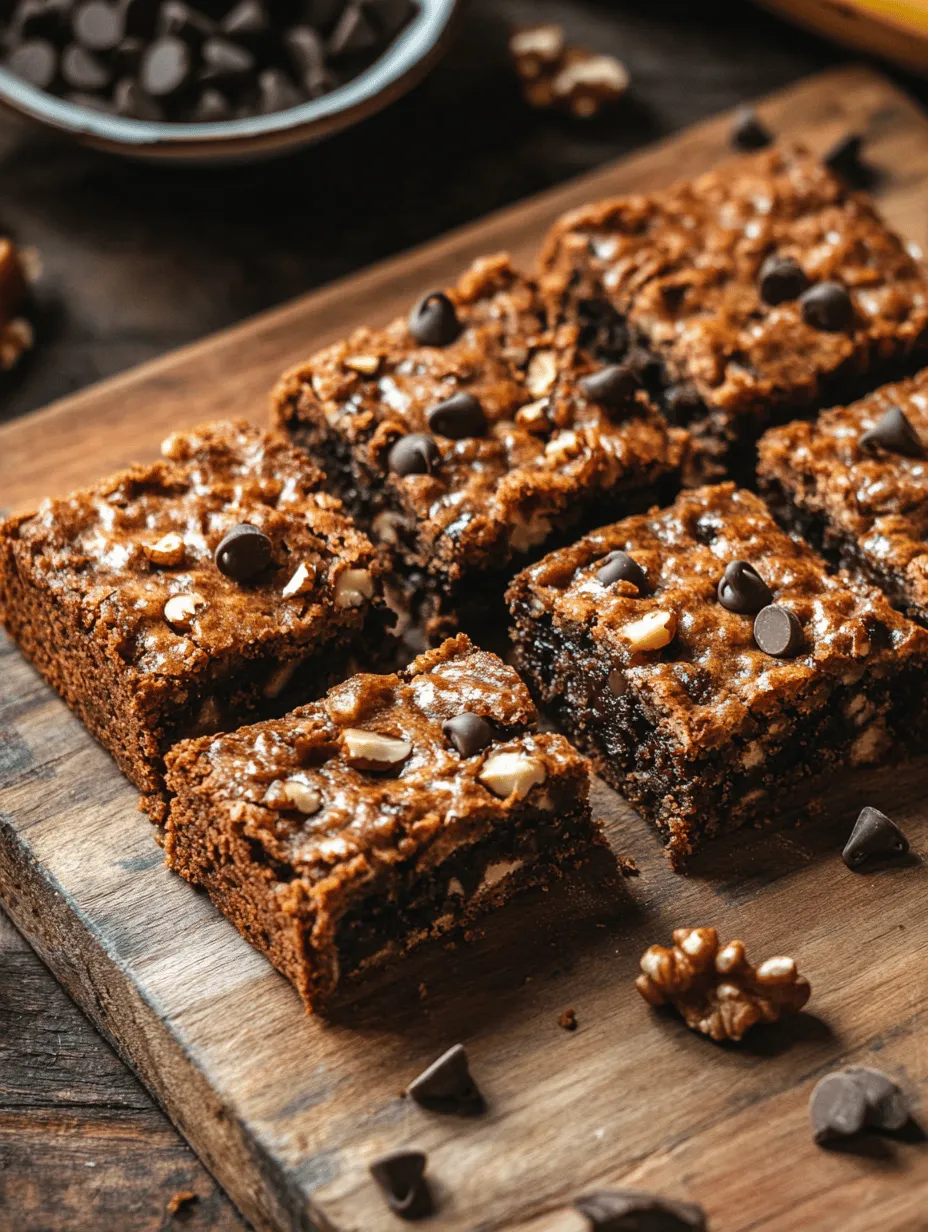
Semi-Sweet Chocolate Chips
For chocolate lovers, semi-sweet chocolate chips are the perfect addition to these bars. They melt beautifully during baking, creating pockets of gooey chocolate that add decadence to the dessert. Whether you choose to use chocolate chips or chunks is entirely up to your preference; both will yield delicious results.
Walnuts
While walnuts are listed as an optional ingredient, they can provide an excellent texture and nutty flavor that complements the other components. Chopped walnuts add a satisfying crunch to the soft bars and enrich the overall flavor profile. If you or someone you are baking for has nut allergies, feel free to omit them without compromising the recipe.
Preparation Steps Explained
Now that you understand the ingredients and their roles, let’s dive into the preparation process for Choco-Banana Bliss Bars. This step-by-step guide will ensure you create a delicious batch of bars that everyone will love.
Step 1: Gather Your Ingredients
Before you start baking, make sure you have all your ingredients ready. This includes ripe bananas, unsalted butter, brown sugar, egg, vanilla extract, all-purpose flour, baking powder, baking soda, salt, semi-sweet chocolate chips, and walnuts if you’re using them. Having everything at hand will make the process smoother and more enjoyable.
Step 2: Preheat Your Oven
Preheat your oven to 350°F (175°C). This step is crucial as it allows the bars to bake evenly. While the oven is heating, you can get started on the next steps.
Step 3: Prepare Your Baking Pan
Line an 8×8-inch baking pan with parchment paper, leaving some overhang on the edges to make it easier to lift the bars out after baking. Lightly grease the parchment paper with cooking spray or a dab of butter to ensure the bars don’t stick.
Step 4: Mash the Bananas
In a large mixing bowl, peel the ripe bananas and mash them using a fork or potato masher until smooth. Aim for a consistency that is mostly lump-free, as this will help achieve a uniform texture in the bars. Set the mashed bananas aside while you prepare the other ingredients.
Step 5: Cream the Butter and Sugars
In another bowl, cream together the unsalted butter, brown sugar, and a pinch of salt using an electric mixer or a whisk. Beat until the mixture is light and fluffy, which should take about 2-3 minutes. This process incorporates air into the batter, contributing to the bars’ lightness.
Step 6: Add the Egg and Vanilla
Next, add the egg and vanilla extract to the butter and sugar mixture. Beat until well combined, scraping down the sides of the bowl as needed to ensure everything is evenly mixed.
Step 7: Combine the Wet and Dry Ingredients
Now, gently fold the mashed bananas into the wet mixture until just combined. In a separate bowl, whisk together the all-purpose flour, baking powder, and baking soda. Gradually add the dry ingredients to the wet ingredients, stirring until no flour streaks remain. Be careful not to overmix, as this can lead to dense bars.
Step 8: Fold in the Chocolate Chips and Walnuts
Finally, fold in the semi-sweet chocolate chips and walnuts (if using) until evenly distributed throughout the batter. The chocolate should be well incorporated, ensuring that every bite is a blissful mix of flavors.
Step 9: Pour the Batter into the Pan
Pour the batter into the prepared baking pan, using a spatula to spread it evenly. Make sure the surface is level to ensure even baking.
Step 10: Bake
Bake the bars in the preheated oven for 25-30 minutes, or until a toothpick inserted into the center comes out clean or with a few moist crumbs attached. The bars should be golden brown around the edges and slightly firm to the touch.
This initial preparation will set the stage for delicious Choco-Banana Bliss Bars that are sure to impress. As the bars bake, your kitchen will be filled with the tantalizing aroma of chocolate and bananas, making it hard to resist the temptation to sneak a taste before they’ve cooled. Stay tuned for the final steps on how to cool, cut, and enjoy your creation!
Preheating the Oven and Preparing the Baking Dish
Before diving into the delightful process of creating Choco-Banana Bliss Bars, it’s essential to prepare the oven and baking dish properly. Preheating the oven to 350°F (175°C) ensures that your bars bake evenly and achieve the perfect texture. An adequately heated oven promotes even rising and avoids the possibility of a soggy center.
Next, prepare your baking dish—typically an 8×8-inch square pan works wonderfully for this recipe. Greasing the pan is crucial to prevent your bars from sticking. You can use cooking spray or line the pan with parchment paper for easy removal. If using parchment paper, ensure it hangs over the edges of the pan slightly; this will act as handles when removing the bars after baking.
Combining Wet Ingredients
With the oven preheated and the baking dish ready, it’s time to combine the wet ingredients. Start with ripe bananas; the riper, the better. Their natural sweetness enhances the flavor of the bars. Use a fork or a potato masher to mash the bananas thoroughly until they are smooth with minimal lumps. This step is vital as it ensures an even distribution of banana flavor throughout the batter, leading to a moist and flavorful final product.
In a large mixing bowl, combine the mashed bananas with melted butter. Using melted butter instead of solid butter will help to keep the bars moist and tender. Mix well until combined. Then, add one large egg and a splash of vanilla extract. These ingredients not only bind the batter but also add richness and depth to the flavor profile. Whisk these wet ingredients together until they are fully blended; a smooth mixture is key to achieving the perfect batter consistency.
Mixing in Brown Sugar and Egg
Once your wet ingredients are well combined, it’s time to incorporate the brown sugar. Brown sugar adds a delightful caramel flavor and moisture to your bars. Using a whisk or a spatula, mix in the brown sugar until fully dissolved in the banana mixture. This is also the moment to ensure your batter is as smooth as possible. If you notice any sugar granules, continue mixing until the batter appears cohesive.
Proper incorporation of the sugar is crucial; it not only sweetens the bars but also contributes to their texture. Aim for a homogeneous mixture, as this will prevent clumping and ensure that each bite is equally sweet and delicious.
Whisking Dry Ingredients
Now, let’s shift our focus to the dry ingredients. In a separate bowl, combine the flour, baking soda, and a pinch of salt. Whisking these ingredients together is crucial to avoid lumps in your batter. When the dry ingredients are evenly mixed, the baking soda can activate properly during the baking process, ensuring that your bars rise beautifully.
Incorporating the flour gradually into the wet mixture helps to prevent overmixing, which can lead to dense and tough bars. This step is essential for maintaining the light and fluffy texture we’re aiming for in our Choco-Banana Bliss Bars.
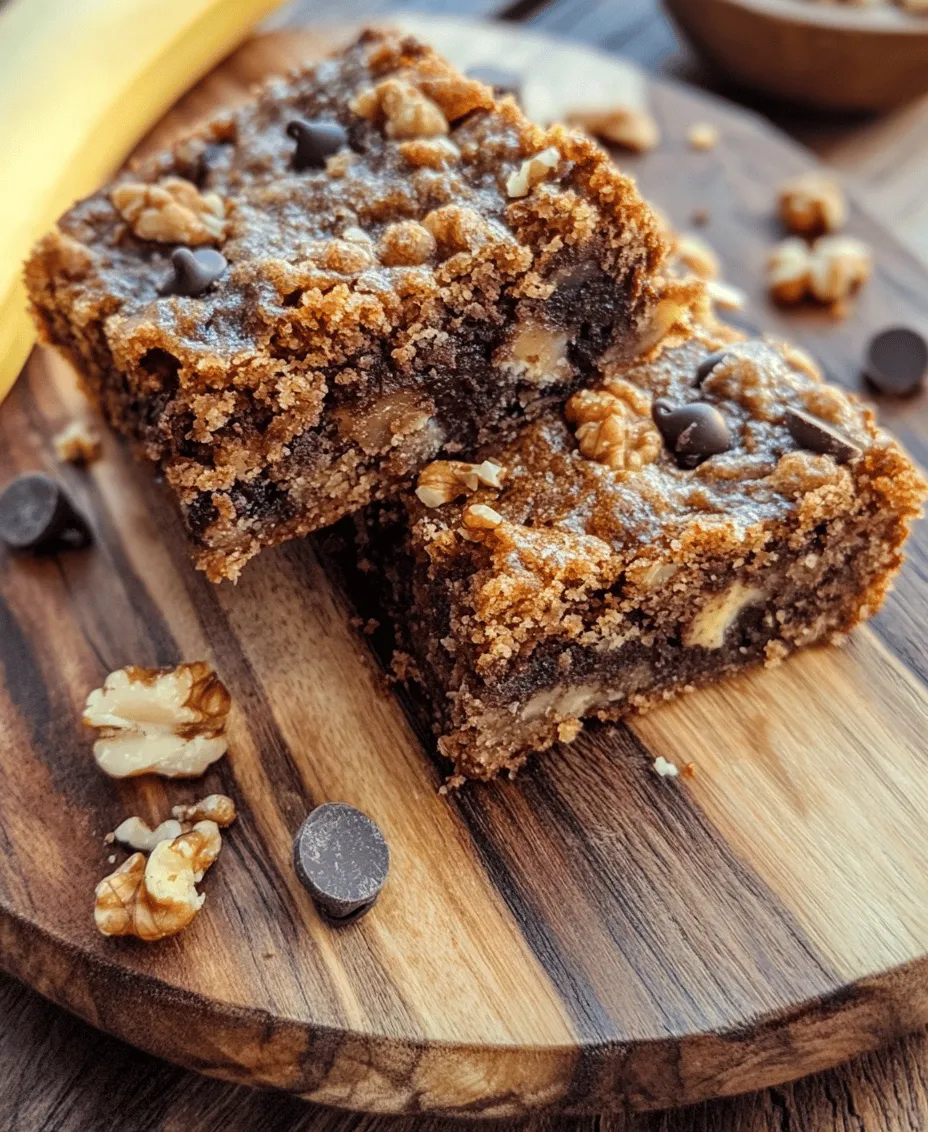
Folding in Chocolate Chips and Walnuts
With your wet and dry ingredients combined, it’s time to add the stars of the show: chocolate chips and walnuts. Gently fold in the chocolate chips, allowing them to disperse evenly throughout the batter. If you prefer a more intense chocolate flavor, you can use dark chocolate chips or even combine different types of chocolate for added complexity.
Next, fold in the chopped walnuts. These not only add a delightful crunch but also provide healthy fats and a nutty flavor that pairs beautifully with the sweetness of the bananas. Be careful not to overmix at this stage; the goal is to combine the ingredients just enough to ensure an even distribution without breaking down the chocolate chips or walnuts.
Baking Tips
Now that your batter is ready, pour it into your prepared baking dish, spreading it out evenly with a spatula. Bake the Choco-Banana Bliss Bars in your preheated oven for 25-30 minutes. A crucial baking tip is to keep an eye on them as they approach the end of the baking time. You can test for doneness by inserting a toothpick into the center; if it comes out clean or with a few moist crumbs attached, your bars are perfectly baked.
Let the bars cool in the baking pan for about 10-15 minutes before transferring them to a wire rack to cool completely. This cooling period allows the flavors to meld and makes cutting the bars easier.
Nutritional Benefits of Choco-Banana Bliss Bars
Understanding the nutritional profile of your homemade treats can enhance your enjoyment of them. Each serving of Choco-Banana Bliss Bars is packed with essential nutrients. A typical bar may contain around 150-200 calories, depending on the specific ingredients used.
Health Benefits of Bananas and Walnuts
Bananas are a powerhouse of nutrition, rich in potassium, vitamin C, and dietary fiber. Potassium is crucial for heart health and muscle function, while fiber aids digestion and can help maintain a healthy weight. Walnuts, on the other hand, provide a significant source of omega-3 fatty acids, which are known for their heart-healthy properties. Together, these ingredients create a delicious treat that offers a range of health benefits.
While these bars contain sugar and fats, moderation is key. Enjoying them as part of a balanced diet, alongside plenty of fruits, vegetables, and whole grains, allows you to indulge without guilt.
Serving Suggestions and Pairings
Choco-Banana Bliss Bars can be enjoyed in a multitude of ways. For a delightful dessert experience, serve them warm topped with a scoop of vanilla ice cream or a dollop of whipped cream. The warm bars paired with cold ice cream create a delightful contrast that is sure to satisfy your sweet cravings.
For a more casual snack, enjoy these bars with a cup of coffee or tea. Their rich banana and chocolate flavors complement a warm beverage perfectly. You can also consider cutting them into smaller squares for a healthier snack option, making them an ideal treat for lunchboxes or on-the-go snacking.
If you have dietary restrictions, there are several variations you can explore. For a gluten-free option, simply substitute all-purpose flour with a gluten-free blend. You can also make the bars vegan by replacing the egg with a flax egg (1 tablespoon of ground flaxseed mixed with 2.5 tablespoons of water) and using dairy-free chocolate chips.
Storage and Shelf Life
To preserve the freshness of your Choco-Banana Bliss Bars, store them in an airtight container at room temperature for up to three days. If you prefer to keep them longer, you can refrigerate them for up to a week. For optimal freshness, consider freezing the bars. Wrap each bar individually in plastic wrap and place them in a freezer-safe bag or container. They can be frozen for up to three months.
When you’re ready to enjoy a frozen bar, simply remove it from the freezer and let it thaw at room temperature for about 30 minutes, or you can reheat it gently in the microwave for a few seconds for that freshly baked taste.
Conclusion
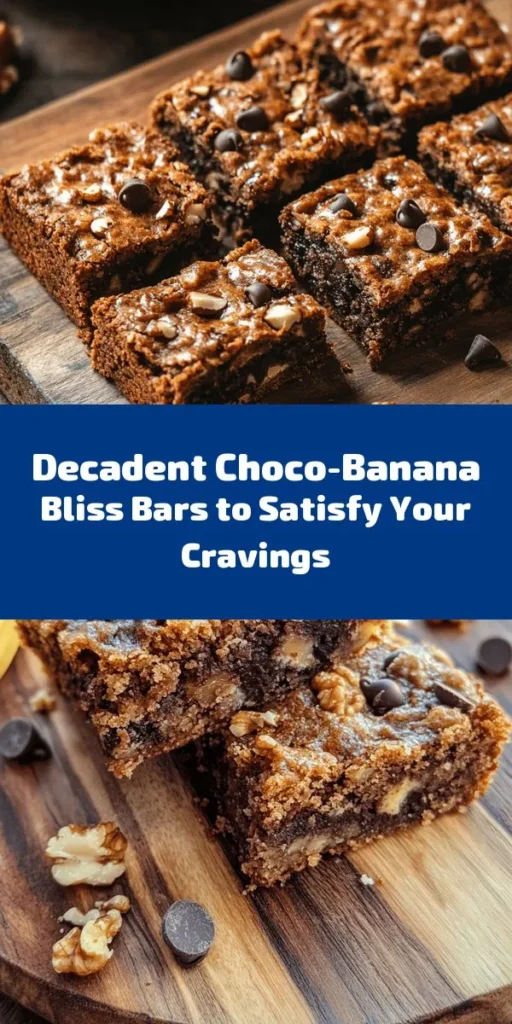
Creating Choco-Banana Bliss Bars is an enjoyable and straightforward baking project that brings the comfort of homemade treats into your kitchen. The delightful combination of bananas and chocolate not only satisfies your sweet tooth but also offers nutritional benefits, making them a treat you can feel good about indulging in.
With the ease of preparation and a variety of serving options, these bars are perfect for any occasion, whether as an after-school snack or a delightful dessert at a gathering. So, gather your ingredients and try this recipe today! You’ll be rewarded with delicious bars that bring a smile and warmth to your day, showcasing the wonderful versatility of bananas in baking and the joy of homemade desserts.