Introduction
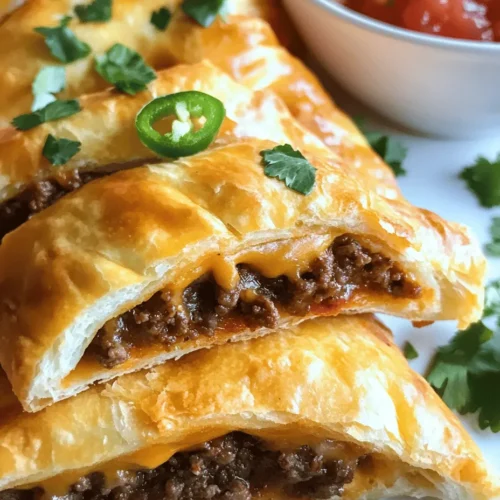
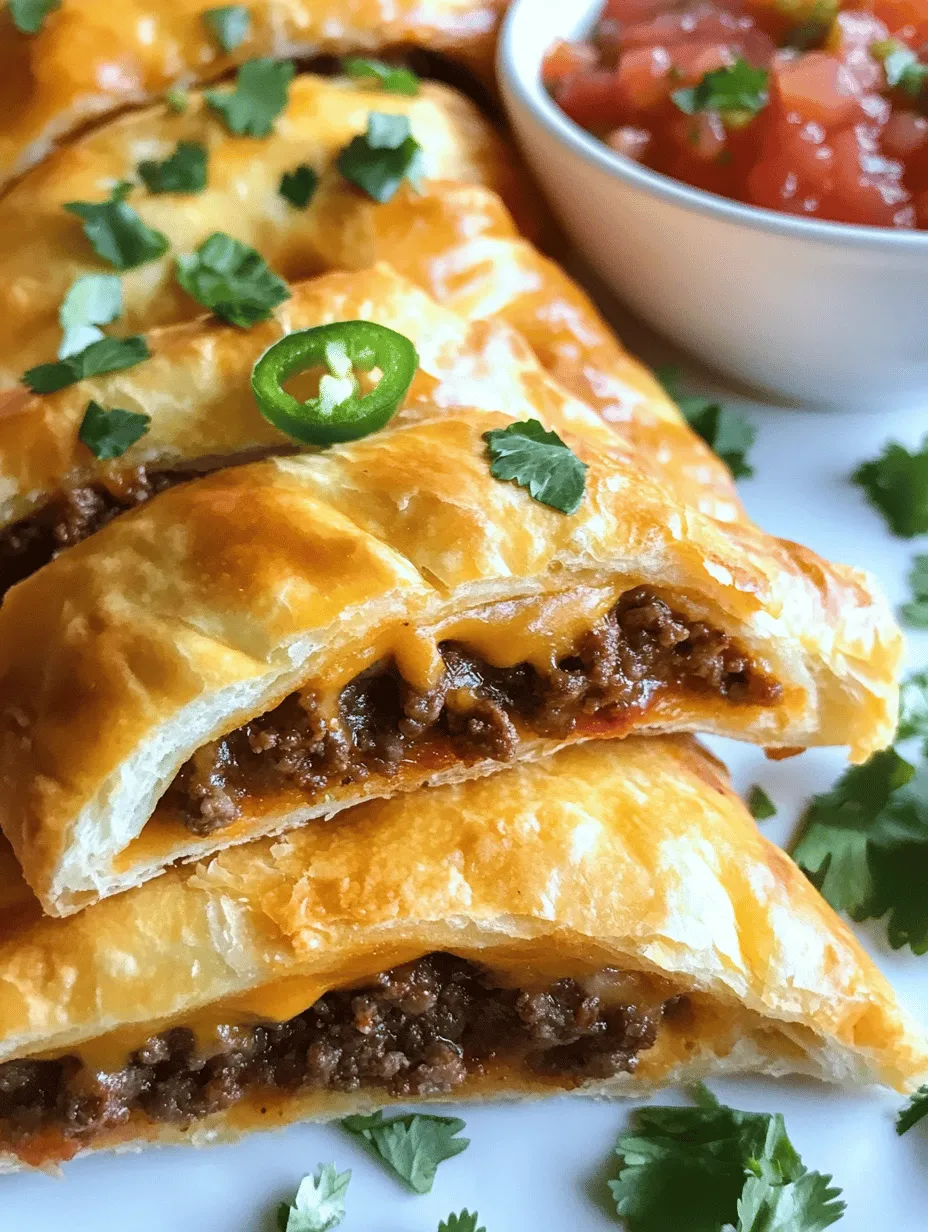
If you’re on the hunt for a crowd-pleasing dish that combines convenience with deliciousness, look no further than Cheesy Taco Sticks. This delightful fusion of flavors and textures promises to elevate any gathering, whether it’s a lively game night, a casual family dinner, or a festive party. Picture this: a crispy, flaky exterior enveloping a savory filling of seasoned meat and gooey cheese, all with the unmistakable essence of tacos. With every bite, you’ll experience the comforting warmth of melted cheese paired with the zesty notes of taco seasoning — a combination that is simply irresistible.
What makes Cheesy Taco Sticks truly special is their versatility. You can easily customize the ingredients to suit your tastes or dietary preferences, making them adaptable for everyone at the table. Whether you prefer classic ground beef, a lean turkey option, or even a meatless alternative with beans or lentils, these sticks can cater to all. Additionally, they can be served as an appetizer, a main course, or even a snack, making them an ideal choice for any occasion. Let’s dive into the components that make this dish a standout, and then we’ll break down the preparation process that will have you whipping up these tasty treats in no time.
Understanding the Ingredients
To create the perfect Cheesy Taco Sticks, it’s essential to understand the roles of each ingredient in the recipe. Here’s a closer look at the main components that come together to create this mouthwatering dish.
Ground Beef or Turkey
The star of the filling, the choice between ground beef and turkey can significantly influence the flavor and texture of your Cheesy Taco Sticks. Ground beef, known for its rich flavor and juicy texture, brings a classic taco taste that many people adore. On the other hand, ground turkey is a leaner alternative that still delivers a satisfying bite while lowering the overall fat content. Both options can be enhanced with the right seasoning, making them excellent choices based on your nutritional needs or personal preferences.
Taco Seasoning
Taco seasoning is crucial in this recipe, as it infuses the meat with authentic taco flavor. Typically made from a blend of spices including cumin, chili powder, garlic powder, and onion powder, taco seasoning introduces a harmonious balance of savory, spicy, and aromatic notes. You can opt for store-bought seasoning for convenience or make your own at home for a fresher taste. Adjusting the amount of seasoning can also allow you to control the spice level, making it perfect for families with varying heat tolerances.
Cheddar and Mozzarella Cheese
No taco dish is complete without cheese, and in this recipe, a blend of cheddar and mozzarella is used for maximum flavor and texture. Cheddar offers a sharp, tangy flavor that complements the seasoned meat, while mozzarella adds a delightful stretchiness that brings the whole dish together. This combination not only enhances the taste but also contributes to a visually appealing presentation when the cheese melts and bubbles in the oven.
Jalapeños
For those who enjoy a bit of heat, jalapeños can be an excellent addition to the filling. These vibrant peppers provide a spicy kick that can elevate the flavor profile of your Cheesy Taco Sticks. You can choose to include fresh jalapeños for a bright, crisp heat, or opt for pickled jalapeños for a tangy twist. If you’re serving a crowd, consider leaving them out of the main filling and providing them as an optional garnish, allowing guests to customize their sticks to their liking.
Crescent Roll Dough
One of the best aspects of this recipe is the use of crescent roll dough, which contributes to the flaky, golden crust of the taco sticks. This convenient option eliminates the need for extensive dough-making, making the preparation process quick and straightforward. As the dough bakes, it puffs up beautifully, encasing the flavorful filling and creating a satisfying crunch that contrasts perfectly with the gooey interior.
Fresh Garnishes and Dipping Options
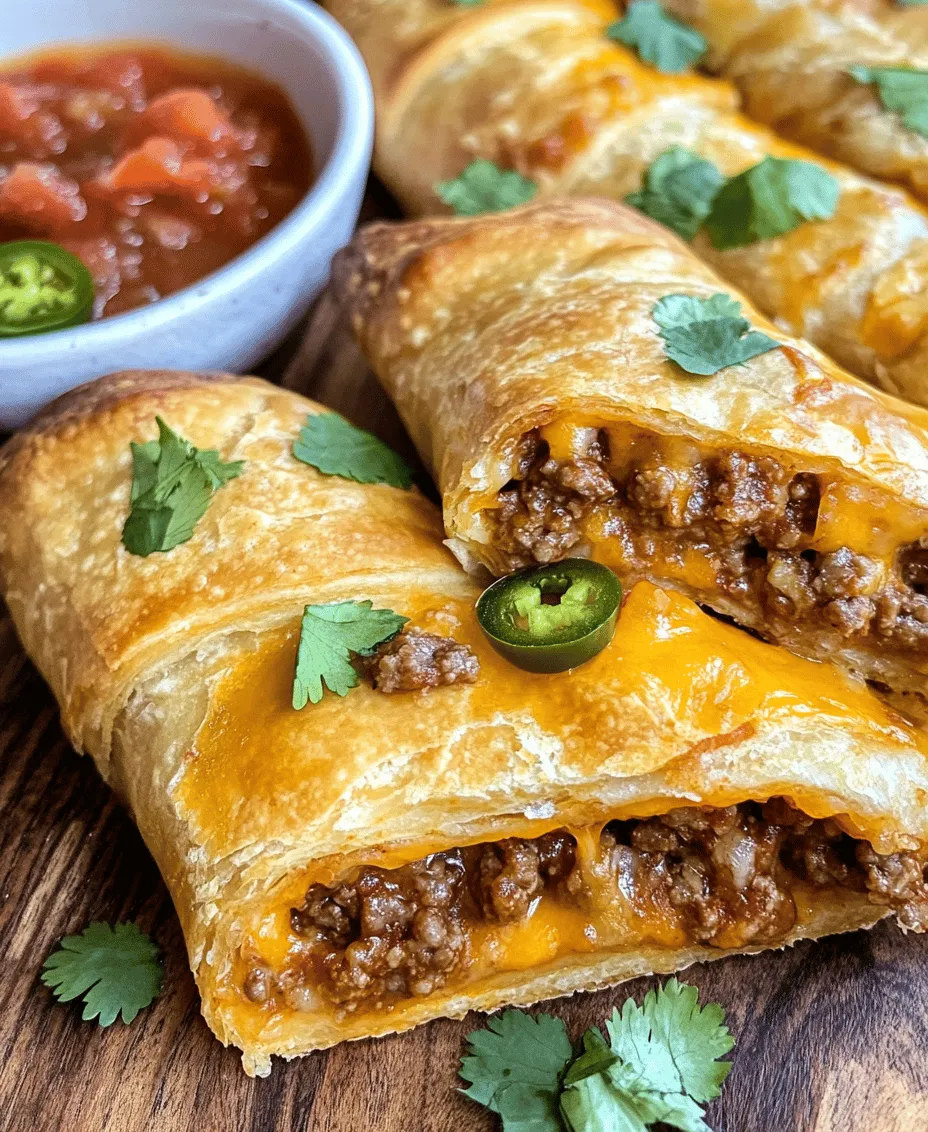
To elevate your Cheesy Taco Sticks even further, fresh garnishes like chopped cilantro can add a pop of color and fresh flavor. Additionally, serving these sticks with dipping sauces such as salsa, guacamole, or sour cream creates a well-rounded experience, allowing everyone to enjoy their own unique combination of flavors. These additions not only enhance the presentation of the dish but also give guests a chance to personalize their dining experience.
Preparation Steps Explained
Now that we’ve covered the essential ingredients, let’s walk through the preparation steps for creating your own Cheesy Taco Sticks. Each step is designed to ensure that the flavors meld beautifully while maintaining the perfect texture.
Preheating the Oven
The first step in any baking recipe is preheating the oven. This is a crucial part of the cooking process, as it ensures that your Cheesy Taco Sticks will bake evenly and achieve that desired golden-brown color. Preheat your oven to 375°F (190°C), which is the ideal temperature for baking crescent roll dough. While the oven is heating, you can move on to preparing the filling.
Cooking the Meat
In a large skillet over medium heat, add your choice of ground beef or turkey. Break the meat apart with a spatula, allowing it to cook evenly. As it cooks, be sure to stir occasionally to prevent sticking and promote even browning. Aim for a nice, brown color, which not only enhances flavor but also improves the overall presentation of your Cheesy Taco Sticks.
Seasoning the Meat
Once the meat is cooked through, it’s time to season it with taco seasoning. For most packages of seasoning, a standard ratio is about 1 packet (1 ounce) of seasoning to 1 pound of meat. However, you can adjust this based on your personal taste preferences. If you prefer a stronger flavor, feel free to add more seasoning or even mix in some additional spices like paprika or cayenne pepper for extra heat. Stir the seasoning into the cooked meat, ensuring it is well-distributed and the meat is evenly coated. If the mixture appears too dry, you can add a splash of water or broth to help the spices adhere better and create a flavorful filling.
As the mixture simmers for a few minutes, take this time to prepare your other ingredients. Grate your cheeses and chop any fresh garnishes you plan to use. By doing this, you’ll streamline the assembly process and ensure that everything is ready when it’s time to fill the dough.
Assembling the Cheesy Taco Sticks
With your meat perfectly seasoned and your ingredients prepped, you’re ready to assemble the Cheesy Taco Sticks. Start by unrolling the crescent roll dough onto a clean surface. Separate the dough into triangles according to the perforations. On the larger end of each triangle, add a spoonful of the seasoned meat mixture, followed by a generous sprinkle of cheddar and mozzarella cheese. If you’re using jalapeños, now is the time to add them for a bit of heat. Carefully roll the dough starting from the wide end, rolling toward the point of the triangle, and place the completed stick on a baking sheet lined with parchment paper.
Continue this process until all the dough and filling are used up. Ensure that the taco sticks are spaced adequately on the baking sheet, as they will expand while baking. For an extra touch of flavor, you can brush the tops of the sticks with a bit of melted butter and sprinkle some garlic powder or additional cheese on top before placing them in the oven.
With your Cheesy Taco Sticks assembled and ready to go, it’s time to bake them until golden and delicious. In the next section, we’ll cover what to expect during the baking process, tips for achieving the perfect result, and ideas for serving these delightful treats.
Preparing the Dough: Techniques for Rolling and Sealing
To create the perfect Cheesy Taco Sticks, the first step is preparing the dough. Start by using either store-bought crescent roll dough or making your own from scratch. If you choose to make your own, ensure it’s well-kneaded and allowed to rest, which will make it easier to roll out. When you’re ready, lightly flour your work surface to prevent sticking and roll the dough into a rectangle about 1/8 inch thick.
When it comes to sealing the dough, use a combination of your fingers and a rolling pin. First, gently press the edges of the dough to seal any seams, ensuring there are no gaps where the filling could escape during baking. For added security, you can use a fork to crimp the edges, which not only seals the filling inside but also adds a decorative touch.
Filling the Dough: Suggested Amounts for Optimal Flavor Without Overflow
Next, it’s time to fill the dough. A well-balanced filling is essential for these Cheesy Taco Sticks. A good starting point is to use about 1/3 cup of your taco meat mixture per stick. This amount ensures that each stick is packed with flavor but not so full that it overflows during the baking process.
Distribute the filling evenly along one edge of the dough rectangle, leaving about half an inch of space at the sides and about an inch at the ends to prevent spillage. You can create a little mound of filling that tapers slightly, which will help you achieve a tighter roll.
Rolling Techniques: Ensuring Tight Rolls to Keep Filling Intact
Once your filling is in place, it’s time to roll the dough. Start at the edge with the filling and carefully begin to roll it up, keeping the filling tucked in as you go. The key here is to roll tightly but not so tight that you squeeze the filling out. Aim for a consistent pressure as you roll, and make sure the seam side is facing down once you have rolled it all the way up.
After you have formed the rolls, you can slice them into 1-inch thick pieces. This will help them cook evenly and maintain the integrity of the filling. If you notice any filling peeking out, simply pinch the dough back together.
Baking Preparation: Importance of Egg Wash and Olive Oil for Texture
Before baking your Cheesy Taco Sticks, prepare them for the oven with an egg wash. Whisk together one egg with a tablespoon of water and brush this mixture over the tops of your rolled sticks. This step is crucial as it gives the dough a beautiful golden-brown color and a glossy finish.
In addition to the egg wash, lightly drizzle some olive oil over the sticks or brush it on for added flavor and crispness. This small touch enhances the overall texture and prevents the dough from becoming too dry while baking.
Baking Process: Optimal Time and Temperature for Perfect Results
Preheat your oven to 375°F (190°C). Place the Cheesy Taco Sticks on a parchment-lined baking sheet, making sure to leave some space between each one to allow for even cooking. Bake them for about 15-20 minutes or until they are golden brown and puffed up. Keep an eye on them in the last few minutes of baking to prevent over-browning.
Once they are out of the oven, allow them to cool for a few minutes on a wire rack to maintain their crispness.
Serving Suggestions
Once your Cheesy Taco Sticks are ready, it’s time to serve! Presentation can elevate your dish from simple to spectacular. Consider arranging the sticks in a fan shape on a colorful platter, garnished with fresh cilantro or chopped green onions for a pop of color.
For dipping sauces, while salsa and sour cream are classic choices, why not get creative? Try serving them with guacamole, a zesty lime crema, or even a spicy chipotle ranch dressing. These options will enhance the flavors of the taco sticks and provide a delightful contrast.
Pair your Cheesy Taco Sticks with refreshing beverages like a cold margarita, iced tea, or even a light lager to complement their cheesy, savory goodness. As a side dish, consider a fresh salad with a tangy vinaigrette or some roasted corn on the cob for a vibrant, well-rounded meal.
Nutritional Information
Understanding the nutritional profile of your Cheesy Taco Sticks can help you make informed choices. Each serving roughly contains around 250-300 calories, depending on the ingredients used. The primary ingredients—ground meat, cheese, and dough—offer a good source of protein and carbohydrates.
If you’re looking to modify the recipe for dietary reasons, consider using lean ground turkey or chicken instead of beef to cut down on fat. For a vegetarian option, substitute the meat with black beans or lentils, which are excellent sources of protein and fiber. Additionally, using whole-grain dough can boost the fiber content, making the dish even healthier.
Storing and Reheating
To store your Cheesy Taco Sticks, allow them to cool completely before placing them in an airtight container. They can last in the refrigerator for up to 3 days. If you want to keep them for a longer period, consider freezing them. Wrap each stick in plastic wrap and place them in a freezer-safe bag. They can be frozen for up to 3 months.
When it’s time to enjoy your leftovers, the best method for reheating is to bake them in the oven. Preheat your oven to 350°F (175°C) and place the sticks on a baking sheet. Heat for about 10-15 minutes or until warmed through. This method will help maintain their crispy texture, ensuring they taste just as delightful as when they were freshly baked.
Conclusion
Cheesy Taco Sticks are not only a fun and flavorful dish but also a versatile addition to any meal or gathering. They can serve as an appetizer, a snack for game day, or even a main dish accompanied by a fresh salad. The combination of cheesy goodness and taco-inspired flavors makes them a crowd-pleaser for both children and adults alike.
As you experiment with this recipe, remember that cooking is about joy and sharing. Invite friends and family into your kitchen, and enjoy the process of creating these delicious Cheesy Taco Sticks together. They are sure to become a favorite in your culinary repertoire, perfect for any occasion. Happy cooking!